


What happens if you can't find that perfect photograph? What if you want to make things a little bit more active than they are in the stock photo? Here is a little technique that should help you in those circumstances.
What I want to do is to take a photo that I have of a cheetah, put a background behind it and then make it look as though the cheetah is moving.
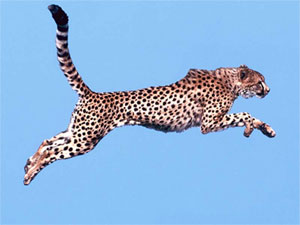
I start out with a photo of a cheetah. The background is completely blue, which will save me a lot of time.
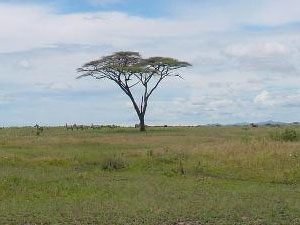
Then I choose a nice background image. Here is a shot of the the Serengeti.
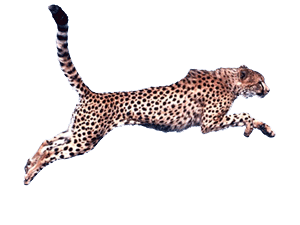
Since the background on the cheetah photo is all blue, I can use my magic wand tool to select the blue parts and then simply hit delete. I love the magic wand tool. Here's what it will look like.
Now I simply place my cheetah photo on a layer above the background photo. The background photo will now show through just perfectly.
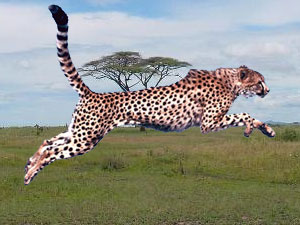
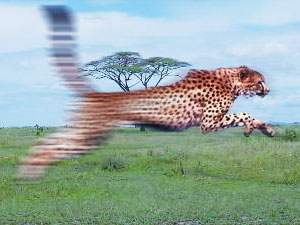
At this point it looks pretty fake. I want to make the image look as though I took it with a camera with a shutter speed that was a little slow. This will give me a nice blurred effect. Yet the only thing that is blurred should be the cheetah. The background would not be moving, only the animal. To achieve this, we will create a controlled blur on the cheetah.
Select your circle marquee tool and draw a oval shaped selection around the cheetah's head.
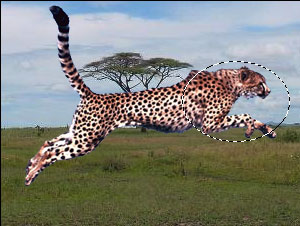
Now we want to feather the selection a bit to make it more realistic. Go Modify -> Feather. I gave mine a 30 pixel feather. Now invert the selection Shift + Command + I .
Now we are going to do the blur.
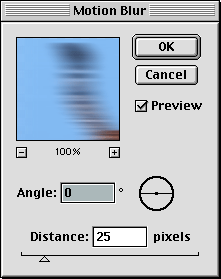
We are going to give it a motion blur with the angle at 0 degrees. This will be straight across. Look at the dialog box above for the exact numbers I used.
Once we have completed the blur, we are done. On this piece I decided to duplicate my first cheetah layer (with the blue background), set it on top of the other two layers and set the blending mode to Overlay. I also dropped down the opacity a bit. This seems to have lightened the image a bit and gave the whole thing a more consistent lighting that I think is more realistic.
That's it for this week. Have fun!
 Josh
Spivey is a web designer and developer for Conkling
Fiskum & McCormick, a Public Relations firm in
Portland, Oregon. Josh has been working with the web
for 3 years, and has earned several awards for his
work. In addition, his work has been featured in Fortune
Small Business magazine. Josh uses Photoshop as his
main web design tool. From start to finish, Photoshop
is the key part of his web design toolbox. When he is not working,
Josh enjoys golf, spending time with friends and family,
and digital photography.
Josh
Spivey is a web designer and developer for Conkling
Fiskum & McCormick, a Public Relations firm in
Portland, Oregon. Josh has been working with the web
for 3 years, and has earned several awards for his
work. In addition, his work has been featured in Fortune
Small Business magazine. Josh uses Photoshop as his
main web design tool. From start to finish, Photoshop
is the key part of his web design toolbox. When he is not working,
Josh enjoys golf, spending time with friends and family,
and digital photography.