
This is a fun week, so let's do something fun. Rather than give you any productivity advice, I'll give you a little project that will make you smile.
We are going to learn how to create pipes and then blend them together. In other words we are going to be building a pipe with another pipe sticking out of it as if it had been molded as one unit.
First thing to do is to open a new document. I made mine 250 x 250 pixels. Make the background black. Then using your rectangle marquee tool, draw a rectangle about like I have it here.

Now grab your gradient tool with white as the foreground color and black as the background color. Create a new layer. On the new layer and using the reflective gradient option, swipe a gradient from just above center down to just past the bottom. Then deselect it.

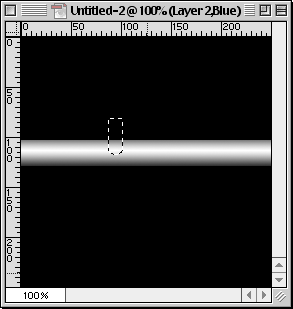
Now grab your rectangle marquee tool again and draw another rectangle, this time vertically oriented. Don't deselect it. Grab the circle marquee tool. While holding the Shift key, which adds to the selection, draw an oval shape from the left side of the rectangular selection you just made down a little past the bottom of the rectangle selection. What you will get is one complete selection that is long, square on one side and rounded on the other.
Now create a new layer on top of the other pipe layer. Get your gradient tool back out of the toolbox and swipe a gradient starting just to the left of center in the selection going right just outside the selection. Deselect it now.
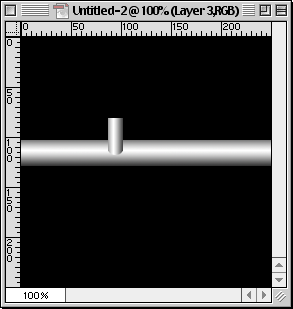
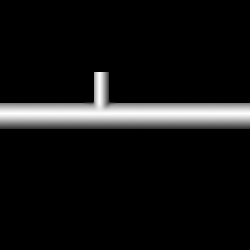
Now using the Move tool, adjust the position of the upper pipe so that the top of the curve lands just on the upper edge of the main lower, horizontally-oriented pipe. See my image for help.
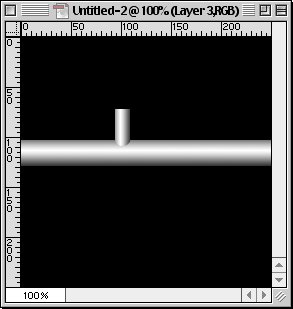
Once you have it just right, merge the upper pipe layer with the lower pipe layer. The quick key for that is Command + E.
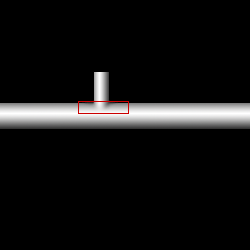
Now comes the fun part. Grab the Blur tool out of the toolbox. It looks like a little drop of water. Use 100% pressure and normal mode in the options palette. I used about a 10 pixel brush size with 0% hardness selected. Carefully brush across the bottom of the upper pipe going from side to side. Quick little clicks are best. Don't go to crazy. A few little dabs at the edges will do the trick. See the next image to tell what area I am talking about.
Once you are done, your image should look something like this:
 Pete
Bauer is the Help Desk Director for NAPP, as well
as a Contributing Writer for Photoshop User and Mac Design
magazines. His books include "Special Edition Using
Adobe Photoshop 7" (with Jeff Foster), "Special
Edition Using Adobe Illustrator 10," "Sams Teach
Yourself Adobe Illustrator 10 in 24 Hours" (with Mordy
Golding), and "Special Edition Using Adobe Illustrator
9." Pete writes documentation for a variety of computer
graphics related products, as well as testing software
for a number of companies. As a computer graphics efficiency
consultant, Pete specializes in customized training programs.
He is based in Columbus, Ohio, and can be contacted via
Pete
Bauer is the Help Desk Director for NAPP, as well
as a Contributing Writer for Photoshop User and Mac Design
magazines. His books include "Special Edition Using
Adobe Photoshop 7" (with Jeff Foster), "Special
Edition Using Adobe Illustrator 10," "Sams Teach
Yourself Adobe Illustrator 10 in 24 Hours" (with Mordy
Golding), and "Special Edition Using Adobe Illustrator
9." Pete writes documentation for a variety of computer
graphics related products, as well as testing software
for a number of companies. As a computer graphics efficiency
consultant, Pete specializes in customized training programs.
He is based in Columbus, Ohio, and can be contacted via