
We at Web Design Library would like to assure you, that there is more to the birth of a snowflake than Aristotle's assertation that "when a cloud freezes there is snow." Snow is not merely frozen rain. It is what children assume it is: a wonder. Fortunately, it is replicable if not in temperature and taste, at least in texture and shape using a few handy web design tricks and tips.
1. Open Photoshop.
2. Open desired text or image, or create one right now (or download my image here).
3. Expand image to 234x150px (Image > Canvas Size...) width 234 pixels, height 150 pixels.
First of all we will add some snow to the image.
4. Create a new layer (layer > new > layer... or ctrl+shift+n) and call it Snow1.
5. Now double click on Snow1 layer to open Layer Properties.
6. Select Gradient Overlay checkbox and use the following:
Click to Enlarge
|
Here is the gradient I used:

Click to Enlarge
|
7. Select Stroke checkbox and use the following settings:
Click to Enlarge
|
Here is the color I used:
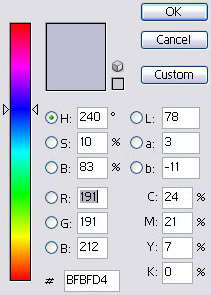
Click to Enlarge
|
8. Now select Brush tool ![]() (B).
Set brush size 4 px (I used 4px diameter but you may select bigger diameter if you have a bigger image...
Anyway, you can always experiment with the size.
(B).
Set brush size 4 px (I used 4px diameter but you may select bigger diameter if you have a bigger image...
Anyway, you can always experiment with the size.
9. So, we have prepared for the main part - making snow. Use brush tool to paint snow. Click the upper portion of the text and drag your mouse along the letters. It is possible to move along... to You can move a bit over the letters themselves to increase the volume of snow (to make it hang from eaves or letters). Cover a few letters in such way (Web). Then create a new layer using the same settings (steps 4-7). Cover a few more letters with snow (Design). And then move on to the word "Library" - on a new layer as well.

Now it's time to add to frosty air to the picture.
10. Create a new layer (layer > new > layer... or ctrl+shift+n) and call it Air.
11. Select gradient tool

Click to Enlarge
|
and then select Radial Gradient:![]()
12. Now left click the mouse in the center of the text and without releasing it "drag and drop" to the upper border of the image. Then use "Free Transform" (Edit > Free transform or ctrl+t). Lessen the resultant gradient in such manner that it is possible to cover most of the text. Then drag the layer behind the first layer. (in layer panel drag this layer down to the bottom)

13. Take the picture with snowflakes here. You may just paste this picture to your image or use snowflakes separately and place them where you wish.
So, look what we have.

I hope this tutorial will be helpful for you.
Best regards, Dustin Kein, WDL team.
