1) Make a 400x400 document. Make sure your background is #CCCCCC.
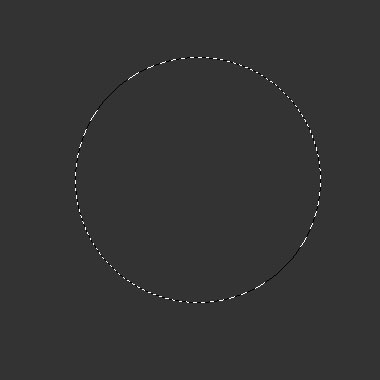
2) Now select the Elliptical Marque Tool and make a nice selection in the middle of your canvas (hold shift to get a accurate circle):
3) Make a new layer and fill the selection in with #BFBBBB.

Don't remove the selection just yet. Select the marque tool again and right click the selection, go to Transform Selection. Hold shift and make the selection a bit small. Example:
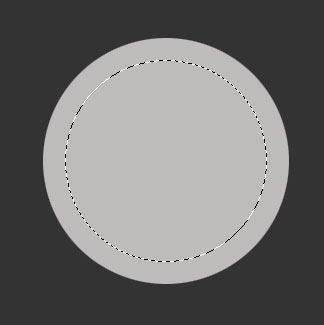
Delete the selection:

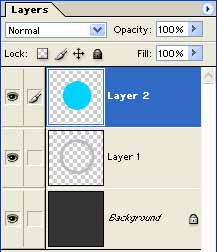
4) Make another new layer and fill it in any color you prefer, I filled it in with a bright blue.

Ok, so now you have 3 layers.
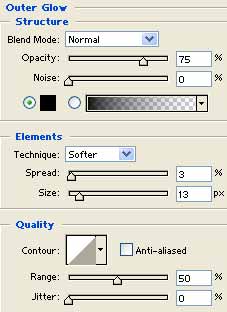
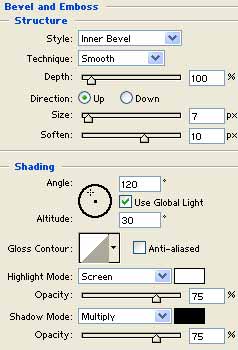
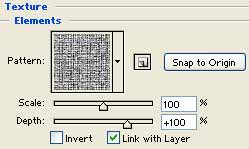
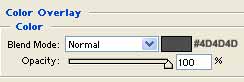
5) Select Layer 1 and apply these blending options:
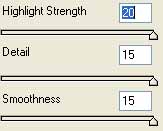
6) Select Layer 2 and apply Filter>Artistic>Plastic Wrap and use these settings:
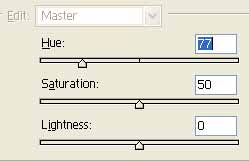
7) Apply these Hue settings (CNTRL+U):
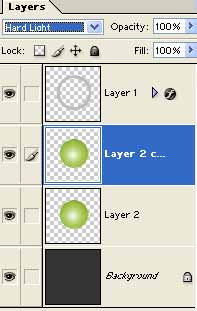
Duplicate the layer and set the blending option to Hard Light:
There ya go, your xBox inspired orb should look similar to mine below: