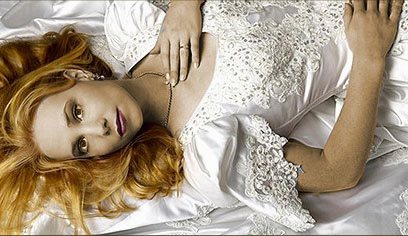
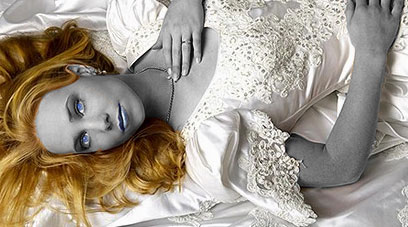
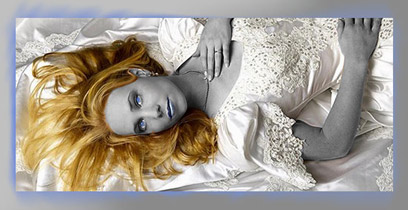
As soon as I saw Web Design Library's templates I came upon an interesting picture from the wedding templates category. I liked it, and I decided to place it on my desktop. However, inasmuch as it was small, I decided to embellish it a bit it, to make it look like real wallpaper.
So, here is my initial picture taken from the template.
I decided to add a few effects, to make the girl look dead, to give the picture some elegance ( in this case
Open your image in Adobe Photoshop.
With the help of Lasso Tool (L), Magic Wand Tool (W) select the girl's skin.
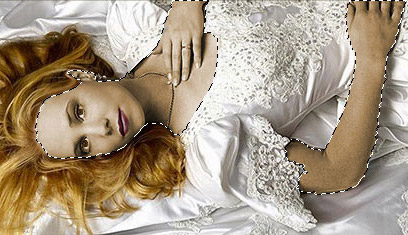
Desaturate it (Image>Adjustments>Desaturate or Ctrl+Shift+U). Deselect (Ctrl+D). Now we have grey skin.
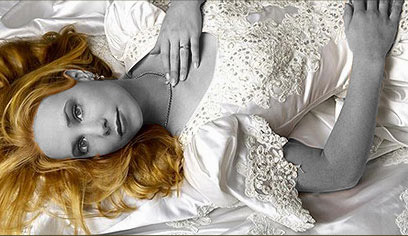
Now it's time to add blue to her eyes and lips. As in the third step, select her eyes and lips.

Create new layer (Layer>New>Layer... or Ctrl+Shift+N).
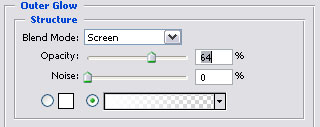
Set blue foreground color (I used #748ED5) and fill selection with it. Set Blending Mode Vivid light to the layer and opacity 60%. Add Outer Glow to the layer. I used the following settings:
Here what I have:
So, you have finished with the girl, and now it's time to add the background. It should be grey as the girl's skin is grey.
Expand the image (Image>Canvas Size...) Set width 1024 and height 768 (or that resolution your desktop uses).
Hide all layers except background and select background layer.
Set Foreground color #C0C0C0 and background color #8A8A8A. Select Gradient Tool (G). Select gradient Foreground to Background and place it in the following way:
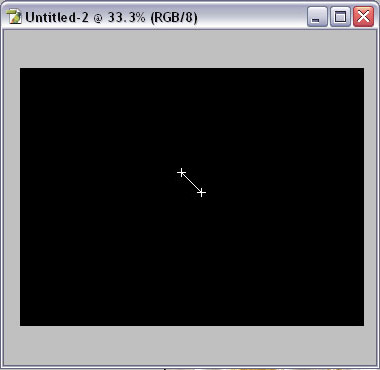
You should get something like this:
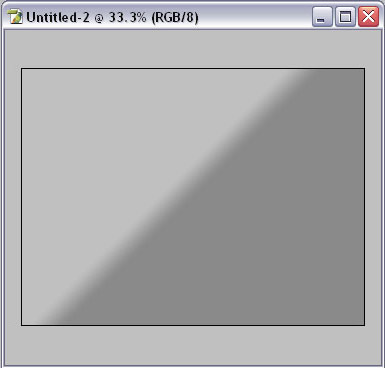
Select Smodge Tool (R) Set brush size 100, strength 50% and on the border drive a bit in order to force different colors to blend one with the other. Apply the Blur filter a few times (Filter>Blur>Blur and then Ctrl+F few times) . You should have something similar to this:
Now make selection of the layer with the girl, leaving the background layer active (Ctrl+click on the layer with the girl). Expand selection (Select>Modify>Expand..., set 4px) Fill it with the color the same as we used on the girl's eyes and lips (#748ED5 in our case).
Now as in step number 8, wash the border with a color somewhere between grey and blue. But while doing this use a smaller brush size (I used 19) and try to spread the blue color outward in order to give the appearance that it has seeped out from the girl. Or you may use Sprayed Strokes Filter (Filter>Brush Strokes>Sprayed Strokes). Don't forget to blur after.
That's all - unhide all layers and the wallpaper is ready. Enjoy it.
Click to enlarge
|
Download ready wallpaper(1024x768)
