1.
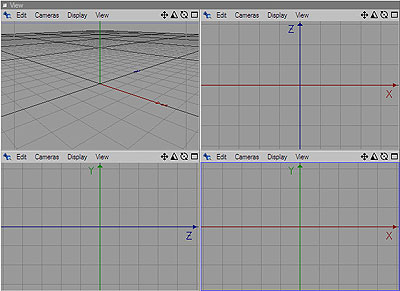
Open Cinema 4d and start off by clicking
"F5" on the top of your keyboard. The screen below should appear.
Now you want to click and hold ![]() that to zoom out on the top-right, the bottom left and the bottom right
screens. Now we can see our piece from all different directions.
that to zoom out on the top-right, the bottom left and the bottom right
screens. Now we can see our piece from all different directions.
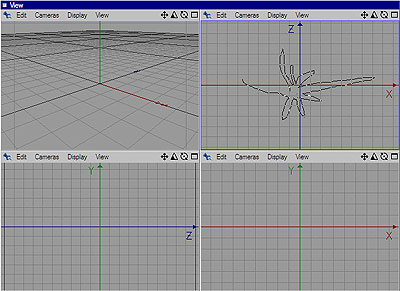
2.
Now select this tool ![]()
and draw different shapes in all 3 (the top-right, the bottom left and the
bottom right screen)
Make them random, yet cool, as I always say :D
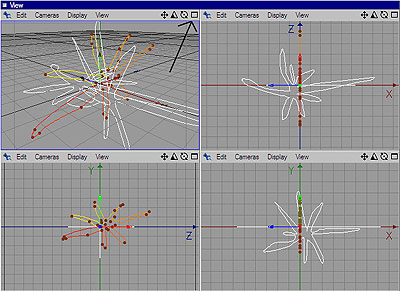
3. Now that you have created all these different shapes, click on the thing that arrow on the image points to. When doing this, you will have one screen again.
4. Now click on Objects - nurbs - loft nurbs. The loft nurb will appear like below, but you'll have to drag all the splines below it.
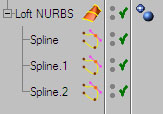
5. Wow, it's starting to take shape since we dragged the splines under the loft nurb. But right now it looks like a model placed outside an important building, but we don't want that, eh? Move on to step 6.
6. Now we want to select the whole object, so click on the loft nurb thing (image in step 4) and go structure - make editable (or just click "c") Now a lot of red dots will appear. We want to drag these. So click them, hold, and drag, like I did below.
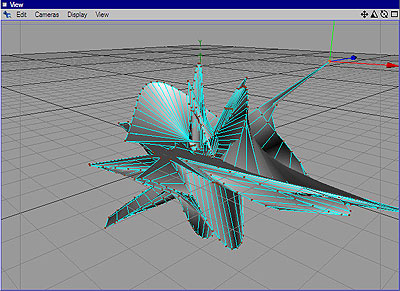
7.
Remember your object will NOT look
like mine, probably not at all.
Now that you've dragged out a lot of those "spikes", you can rotate
and drag more out, or just leave it.
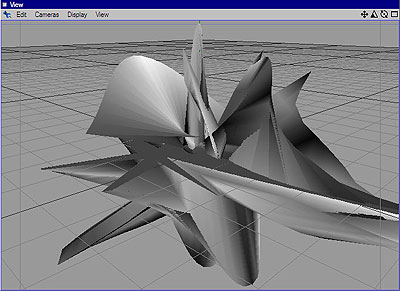
8. Now you can add a material to it. The material should be located somewhere on your lower-left part of the screen. Go file - load materials and find some materials. They are in your cinema 4d section. I just quick rendered to see how it looked so far. You can stop now or move on.

9.
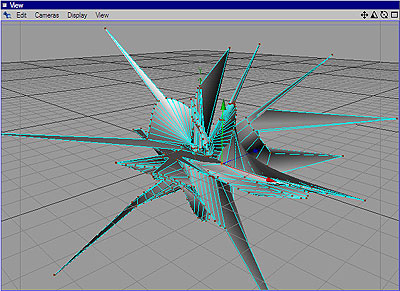
If you want a bigger, and more random
shape go structure - edit surface - matrix extrude and only change the meters
thing to 40 m (Z: 40 m). You can use 200 or 143 or 164 too, try out different
values.
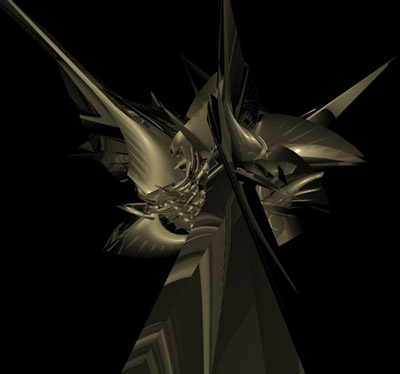
HOW TO RENDER THE OBJECT:
1. Go render - render settings and on "general", set the antialiasing
to "best". On "output", choose what size you want to
use. I used 800x600.
2. Close that render settings window by clicking the "x" in the
top right corner. Go render - render to picture viewer. Now all you do is
wait. The render time varies from computer to computer, depending on the
"strength" of the computer. Hope you enjoy the tutorial. Now play
around in photoshop, your only 1/5 done if you are planning to do an abstract
with light effects.