

Here's a great way to create and reuse text presets to have in storage without having to manually set the text parameters each time.
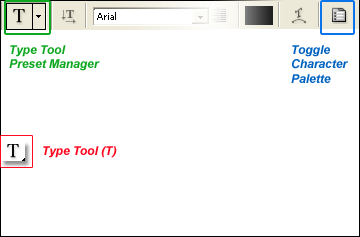
To begin, open a new document and select the 'Type Tool (T)' from the toolbar. (I have it encased in red below.)
Selecting the Type Tool (T) activates specific Type Tool features up on the Options Bar. Of importance for this tutorial, The Preset Manager (encased in Green below) and the Character Palette toggle icon.(encased in Blue below)
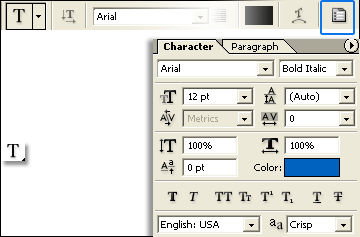
Begin by clicking the Character Palette icon to bring the Character Palette to the foreground.
Next, set your desired text parameters from within the Character Palette, Including color, font style, size etc.
When all your settings are in place, select the Preset Manager Picker (encased in Green below)...
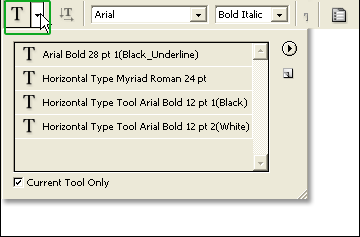
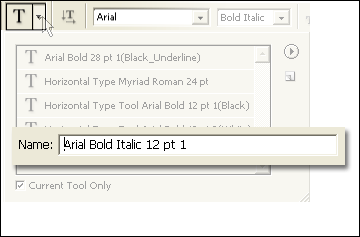
Within the Preset Manger, over to the far right select the 'Create New Tool Preset' icon (encased in Green below).
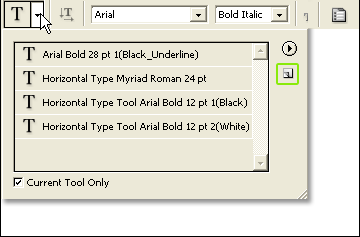
You will be prompted to give it a name, as captured below, then click OK.
The type preset is loaded into the manger window and available to be used at any time. (Highlighted below)
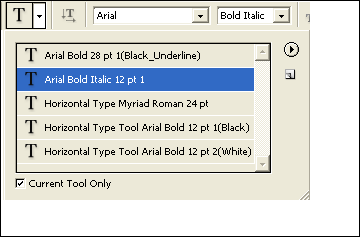
With the Type Tool (T) still active on the Toolbar, activate/select the new preset from within the Preset Manager and then click once onto the your document to add an insertion point and type away.
What you type will contain the settings of that which you embedded into that particular preset.
Tip: Combine Character Palette options with the Paragraph Palette options for robust presets.
Tip: To safeguard against Preference glitches, open the Preset Manager again and from the palette options icon(arrow on the far right), select 'Save Tool Presets' as a new Text Preset with a friendly user name.