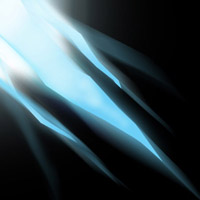
1. Create a new 400x400 pixel document with a resolution of 100 and name it Crystal. Now press D and fill the document (with Black). Now create a new layer, then select the polygonal lasso tool and create a shape similar to one in the picture to the right.

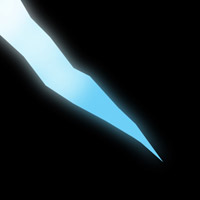
2. Now select the dodge tool and at the top of the window, make the settings as follows, Brush: 100, Range: Midtones, Exposure: 50%. Then make the stem of the crystal lighter, then gradually go to the origional color at the tip. Similar to the picture to the left.

3. Next, you copy the layer, twice. In the first copied layer, apply a gaussion blur with settings [Radius: 10-15].
4. Now in the original layer apply a motion blur and make sure the angle corresponds with the angle in which your crystal is facing. For my crystal I used these settings [Angle: -45°, Distance: 250-280].

5. Now merge all 3 layers (the original, and the 2 copied layers), so they become one layer. Then whan I did is I got the Eraser tool and touched up some areas which I didn't like (the motion blur made too much of a blur in some areas so I erased parts of it). Then you can repeat the tutorial to make a group of crystals and a neat little effect. An example is to the right. If you click on the image to the right you will see a little picture that I made with this tutorial.