 |
|
 |
|
 |
|
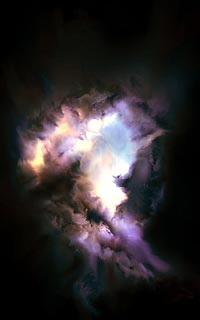
1
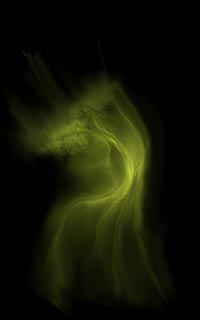
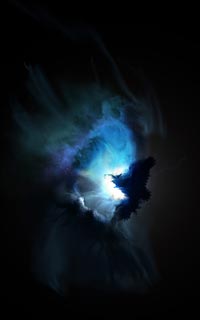
Alrighty then... To begin, I decided to toy around with some
basic whispy shapes. I had no idea what I want to create,
I just wanted to create something.
|
|
|
|
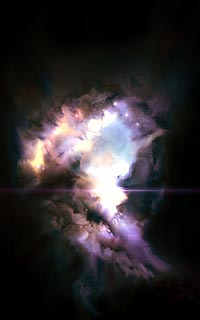
2
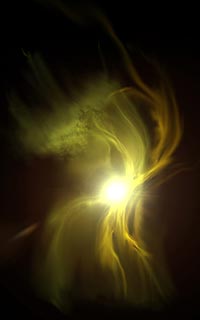
I added a bright light to serve as a focal point for the nebula.
At this point, I'm working on a 500x500px image, because as
far as I know, this is just an excercise...
|
|
|
|
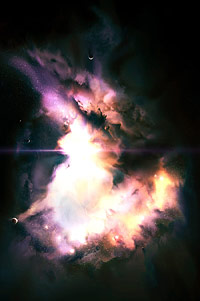
3
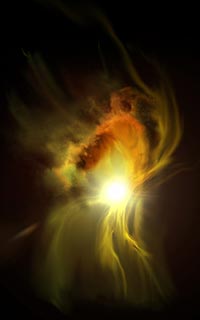
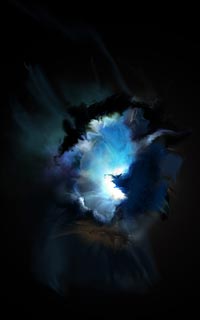
...Or is it? Now it's starting to get interesting. I blew
it up to its full size at this point so I could start adding
some real detail.
|
|
Technique
This was a plain black background with a base layer of green
applied via good ol' "big fuzzy" (aka 300px soft brush)
and several whispy lines drawn in with a smaller brush with
the variables of thickness and opacity being controlled by my
wacom stylus pressure. The mottled part was a sort of mossy
brush I had left over from previous experiments. |
|
|
Technique
The bright light was a camera flare that I radial-blurred
to give a more even gradient and to get rid of those annoying
"flare dots" (you can still see remnants of one of
the dots over on the left side of the image). More whispy lines
via same technique as before. |
|
|
Technique
Now I'm adding general brush strokes on a new layer with
some multiply layer modes and darker colors. My primary goal
at this point is usually just to get stuff down to work with,
so I wasn't too picky about how it got there. |
|
| |
|
|
|
|
 |
|
 |
|
 |
|
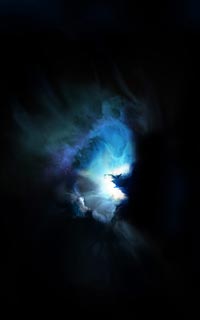
4
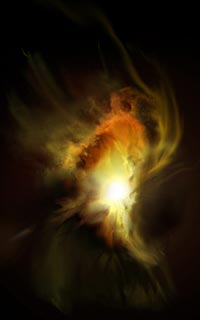
Hmmm... yeah, I'm liking where this is going. More detail,
more puffy clouds to contrast with the whispy remnants of
the earliest strokes.
|
|
|
|
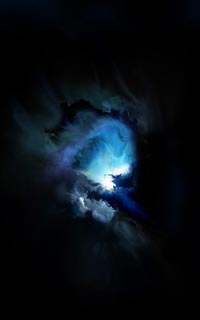
5
Anyone up for blue? I feel like blue. Let's make it blue.
Ok, then. It's blue. I added a darker spot as well, because
you don't really appreciate the light until you lose it.
|
|
|
|
6
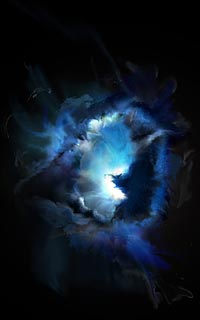
...Holding with that notion, let's block the light some more.
If this was really 3D, we'd see a little reflection on the
interior side of our dark shapes, so I've added that in as
well.
|
|
Technique
More layers with multiply modes. Now it's starting to take
shape as a more refined (albeit nowhere near refined enough)
shape and composition. I've started to smear some interesting
curls out from one of the darker layers over the bright center.
That was done with the smear tool and a wide assortment of general
brushes. |
|
|
Technique
I don't exactly recall what I did to achieve the blues I
got... I think I desaturated the entire image and then brought
each layer up to a different level of blues via color balance.
Again, I've added new layers of color smeared on top of the
brights in mulitply mode to further block the light. The whispy
lines in interior of the cloud are achieved in much the same
manner as the main whisps were in steps one and two. |
|
|
Technique
More layers, and more smearing. I don't think I actually
begin any meticulous refining until step ten or so. It's all
a matter of getting something to work with (kind of like sketching
in realtime). |
|
| |
|
|
|
|
 |
|
 |
|
 |
|
7
Added some more detail... I've got this sense that I've just
gotta make the most of the space around the main event.
|
|
|
|
8
What's going on out there? I don't know, so I just smear some
crap in there to hold the space for later...
|
|
|
|
9
...And it looks pretty damn cool, so I copy and paste it into
a new layer, rotate it, and use it again.
|
|
Technique
People often ask me how I get my "cloudy bits"
drawn... basically, it's just a matter of getting a shape and
shading it. I couldn't be more specific without writing a whole
new tutorial, so I suppose you'll just have to wait until I
do... (sorry!). |
|
|
Technique
I've added a new layer with colors, which I believe is actually
derived from one of the original multiply layers from step three,
changed to linear dodge or screen of course, and smeared like
there's no tomorrow. |
|
|
Technique
Here I've taken the layer I liked and enlarged and smeared
it extensively. Sometimes I like adding a blurred version of
a layer directly on top of the original to soften its details or add a
glow about it without using layer effects. |
|
| |
|
|
|
|
 |
|
 |
|
 |
|
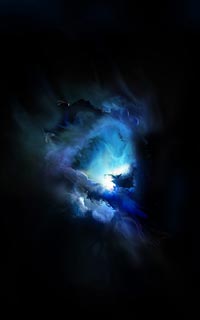
10
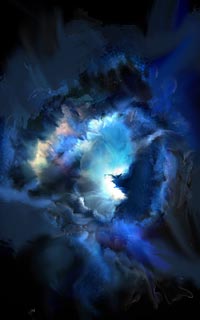
Ok, so now I've gotten a wee bit too wild. I reined myself
back in at this point and returned to the basics, refining
some of the strokes I had prior to my little explosion of
blue.
|
|
|
|
11
I worked some more on the idea of silhouetting dark matter
in front of the light again here (I love doing that). I'm
always interested to see how the dark matter interacts with
the light.
|
|
|
|
12
A little more refining taking place... I know at this point
I've pulled back a bit too much... I need some of that wildness
I cut out back in a more refined, controlled fashion.
|
|
Technique
NOW the refinement begins. I've ommitted some of the wilder
layers (they'll be added back in later in a more controlled
fashion). I've started smearing again, but this time in smaller
strokes, with more sensitivity to the shapes already in place,
working them to give semblances of shape, volume, and contour. |
|
|
Technique
More of the same... the dark part of the cloud was added
in from a layer in previous steps. |
|
|
Technique
More of the same... |
|
| |
|
|
|
|
 |
|
 |
|
 |
|
13
I've worked one of the wild layers from my halfway point back
into the mix, and it's working pretty well...
|
|
|
|
14
...So I grab another one and start refining and taming that
one as well. The blue is getting a little boring to me at
this point. It's too calm, too tranquil. This is a fairly
violent nebula from the looks of it.
|
|
|
|
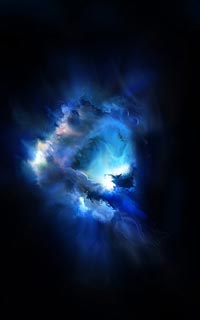
15
Aha! That's a step in the right direction. The color changes
also bring out the cloud texture more, making the whole lower
half glow like a cloud in a lightning storm. I think that's
a keeper.
|
|
Technique
Now I'm adding some of the more exciting bits back in a
layer at a time, still refining via smears and a small amount
of delicate soft brush strokes in Linear Dodge mode or Multiply,
depending on whether I'm working in shadows or light. The Dodge
and Burn tools come in handy as well. |
|
|
Technique
Still adding in new layers ripped from earlier steps, still
refining. |
|
|
Technique
Once I've got the finished structure of the nebula, I changed
the color through a mixture of color hue and saturation, as
well as color balance. I did this layer by layer, NOT to the
image as a flattened whole. |
|
| |
|
|
|
|
 |
|
 |
|
|
As a rule, I always look at space pics at different orientations
to see if I've missed a more dynamic view. In this case, I
like the idea of the nebula kind of pouring down from the
top left to crash and splay outwards at the bottom right.
It also evokes a sort of terrestrial stormcloud appeal at
the top to have it glowing from within like it is.
|
|
|
16
Now for the requisite stars and varied light-rays and effects
that really make a nebula pop. Still needs something, though...
|
|
|
|
Final
Cropped some of the black out, increased contrast and color
saturation, and added some planets.
Yeah, yeah, I know there wouldn't be planets around
a nebula like this in real life, but what's a space pic without
planets?
|
|
|
|
So there you have it...
You've been witness to the making of Riven in all its convoluted
glory. As you can see, I didn't have a plan, I just played
around and developed what I had with the tools at my disposal,
working very much from the gut. I very much enjoy working
with the picture in this manner, because it is such a delight
to see what finally comes out as a result.
|
|
Technique
The larger stars are, more often than not, lots and lots
camera flares in bunches with varying layer modes and sizes.
The light diffraction is a gradient layer that was vastly distorted. |
|
|
Technique
See my planets tutorial
on how to create those... Cropping, rotating, and flipping are
fairly self-explanatory. |
|
|
|
