

It sounds easy, doesn't it? Duplicate one layer's layer mask on another layer. It is easy.but only if you know the technique. A layer mask is a channel that determines the visibility of the content of that particular layer. If multiple layers require the same areas of transparency, you can create a single layer mask and copy it to the other layers. We'll start with a look at creating layer masks.
A layer mask enables you to create areas of transparency on a layer without erasing the layer content. Since the layer's entire content is still available (although partially hidden), you can later edit the layer mask to change the visibility.
NOTE: Keep in mind that a layer named "Background" (in italics) cannot have areas of transparency. Simply double-click the layer name in the Layers palette and rename the layer. That converts the layer to a regular layer, enabling you to show/hide areas selectively with a layer mask.
Creating Layer Masks
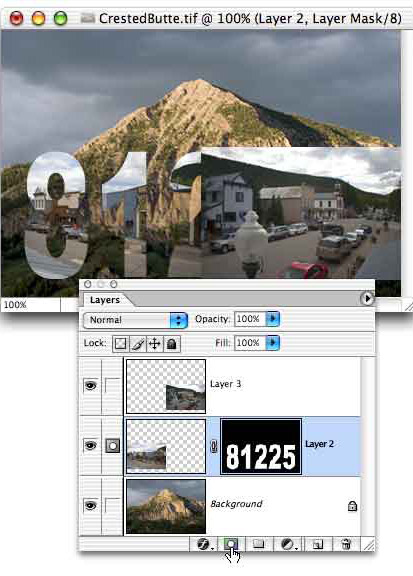
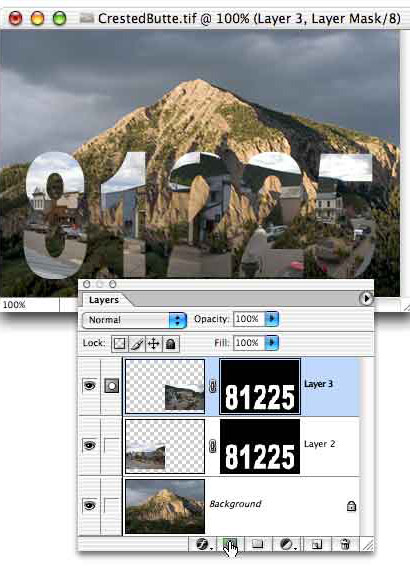
A basic layer mask can be created by making a selection of the
area of the layer that you want visible and then clicking the
Add Layer Mask button at the bottom of the Layers palette. In
this example, the Horizontal Type Mask tool was used to create
a selection in the "shape" of a zip code.
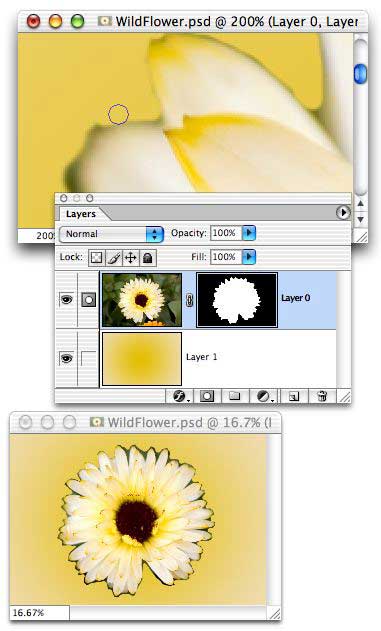
You can also use the painting tools to create a mask. Click the button the add an empty layer mask, make sure the layer mask thumbnail is active in the Layers palette, then paint with black and gray to hide areas of the layer. Where a layer mask is black, the layer is hidden. Where the mask is white, the layer is visible. Shades of gray produce partial transparency.
Keep
in mind, too, that you can refine the mask using the Image>
Adjustment commands. Levels and Curves, for example, can be used to
adjust areas of partial visibility by changing the gray values in the
mask.
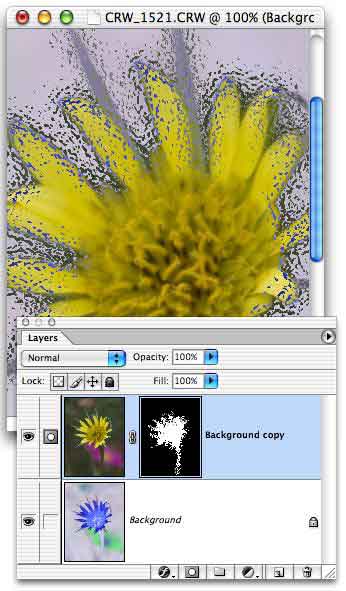
Filters can also be applied to layer masks. Blurring the mask
a bit can slightly soften the edges of the visible areas of the layer.
Other filters can be applied to masks for special effects, such as the
Glass filter (shown here).
NOTE: Remember that, after creating or editing a layer mask, you must click on the left thumbnail in the Layers palette to edit the layer content.
Duplicating a Layer Mask
1. In the Layers palette, Command-click (Mac) or Control-click
(Windows) on the thumbnail of the existing layer mask to make
a selection of the content of the layer mask.
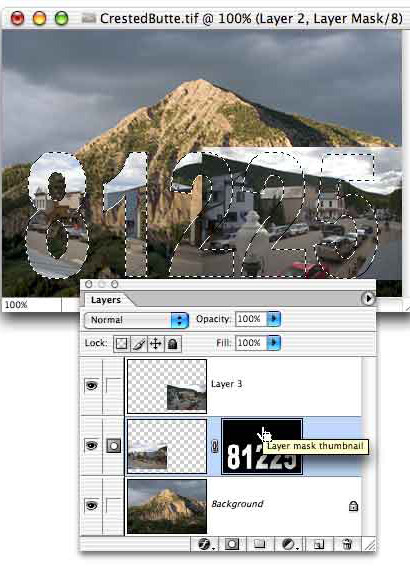
2. In the Layers palette, click on the layer
to which you want to add the layer mask.
3. Click the Add Layer Mask button at the bottom of the Layers
palette.
If you need to reposition the layer mask on the new layer, click on the layer mask channel in the Channels palette and use the Move tool (or the Edit> Transform commands) as necessary.
TIP: Click on the layer mask channel to
make it the active channel, then click in the left column (the
"eyeball" column) next to the RGB (or CMYK) channel to make
the image visible. When finished, remember to click on the RGB
channel to make it active again.
You can also reposition a layer mask without moving the layer
content by first clicking on the link icon between the thumbnails
in the Layers palette. This unlinks the mask from the layer
itself. You can use the Move tool to reposition either the mask
(without moving the layer content) or the layer content (without
moving the mask). Which will be dragged with the Move tool depends
on which thumbnail is active in the Layers palette. (Remember
to re-link the mask and layer afterward by clicking again between
the thumbnails.)
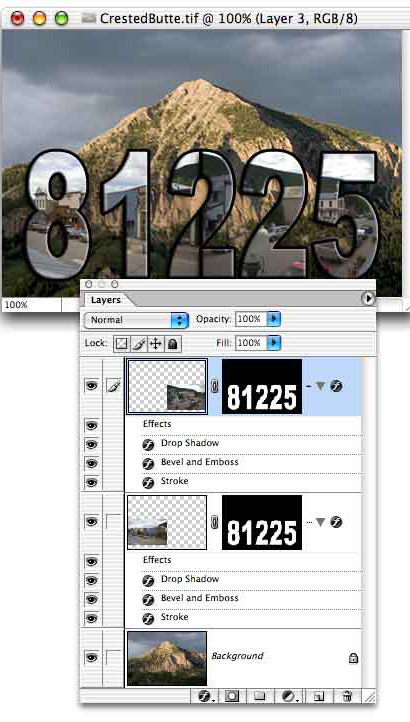
And don't forget.
Any layers style applied to a layer with a mask conforms to
the visibility of the layer. Each effect will follow the outline
of the layer mask. .
 Pete
Bauer is the Help Desk Director for NAPP, as well
as a Contributing Writer for Photoshop User and Mac Design
magazines. His books include "Special Edition Using
Adobe Photoshop 7" (with Jeff Foster), "Special
Edition Using Adobe Illustrator 10," "Sams Teach
Yourself Adobe Illustrator 10 in 24 Hours" (with Mordy
Golding), and "Special Edition Using Adobe Illustrator
9." Pete writes documentation for a variety of computer
graphics related products, as well as testing software
for a number of companies. As a computer graphics efficiency
consultant, Pete specializes in customized training programs.
He is based in Columbus, Ohio, and can be contacted via
Pete
Bauer is the Help Desk Director for NAPP, as well
as a Contributing Writer for Photoshop User and Mac Design
magazines. His books include "Special Edition Using
Adobe Photoshop 7" (with Jeff Foster), "Special
Edition Using Adobe Illustrator 10," "Sams Teach
Yourself Adobe Illustrator 10 in 24 Hours" (with Mordy
Golding), and "Special Edition Using Adobe Illustrator
9." Pete writes documentation for a variety of computer
graphics related products, as well as testing software
for a number of companies. As a computer graphics efficiency
consultant, Pete specializes in customized training programs.
He is based in Columbus, Ohio, and can be contacted via