

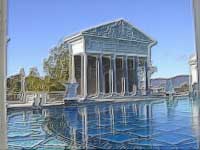
Add an embossed effect to a photo.
 |
1. Open the image for editing. |
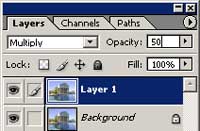 |
2. Duplicate the current layer (Ctrl+J), change the blending mode to Multiply and change the opacity to 50%. |
 |
3. On the new layer, a pply a Find Edges filter (Filter> Stylize> Find Edges) and desaturate (Ctrl+Shift+D). |
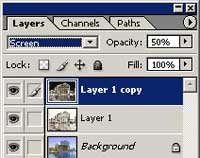 |
4. Duplicate the current layer (Ctrl+J), invert (Ctrl+I) the new layer and change the blending mode of the new layer to Screen. |
 |
5. With the Move tool (v) selected, select the top layer and press the up arrow on your keyboard once, then press then left arrow on your keyboard once. This will nudge your layer by one pixel towards the top left. |
 |
6. Select the middle layer and apply the same technique used in step 5 but nudge the layer by 1 pixel towards the bottom right. |
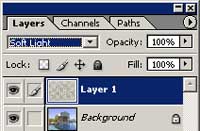 |
7. Select the top layer and merge down (Ctrl+D). Change the blending mode of the merged layer to SoftLight. |

|
8. Rollover the image in this step to see the original image before this Photoshop technique was applied. |