


Create a frightening paranormal television image.
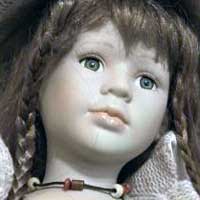 |
1. Open the image for editing. |
 |
2. Add a Grain filter (Filter> Texture> Grain) with the following properties:
Intensity: 55
|
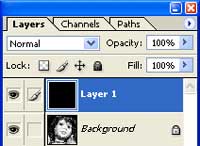 |
3. Create a new layer and fill it with black. |
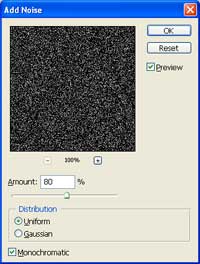 |
4. On the new layer, add an Add Noise filter (Filter> Noise> Add Noise) with the following properties:
Amount: 80%
|
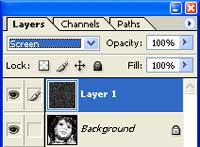 |
5. Change the blending mode of the current layer to Screen. |
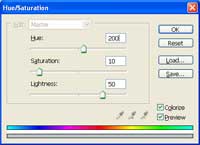 |
6. Add a Hue/Saturation adjustment layer (Layer> New Adjustment Layer> Hue/Saturation) with the following properties:
Colorize: Checked
|
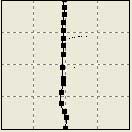 |
7. Select the layer Background and add a Shear filter (Filter> Distort> Shear). Add about 10-20 points on the line. |
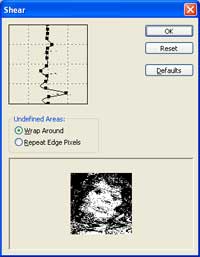 |
8. Move a few of the points towards the left or right to create a distorted image. |
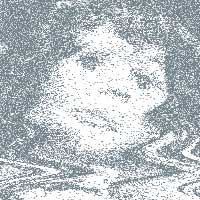 |
9. Rollover the image in this step to see the original image before this technique was applied. |