

| Step 1 Make a new document 350x350 pixels. Make a new layer and call it Tab button. Select your Rectangle Marquee Tool and make a fixed selection of 157x32. You can see an example here:
|


|
| Step 2 Fill the background in any colour you'd like, I chose red. |
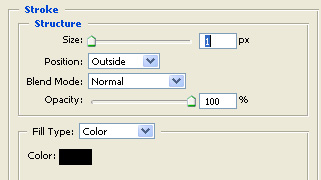
| Step 3 While still selected on the Tab button layer click the
|
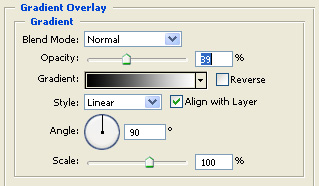
| Step 4 Now while still on the Blending options properties move up to the Gradient Overlay settings. You should then enter in these settings:
|
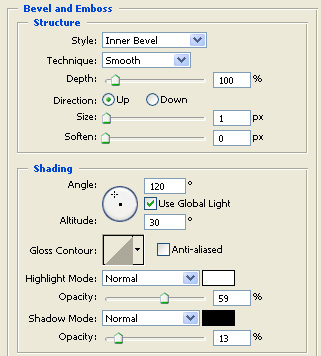
| Step 5 As you can see it is starting to look a lot nicer! Now while still on the Blending Options move up to the Bevel and Emboss settings. You should enter in these settings:
|
| You can now be able to add text to it in anyway you'd like. Its very simple. This can be very helful when making a site, its a nice way of making buttons to integrate with your site. Hope you enjoy! |