


| Step 1 Make a new document of 500x500 pixels. Make the background colour a light green, so we can see what we are doing. On your layers palette, click New Layer. Now select your Text Tool and select "Verdana" as your font, you can enter in anything you want, I entered "Netcubo". |
 |
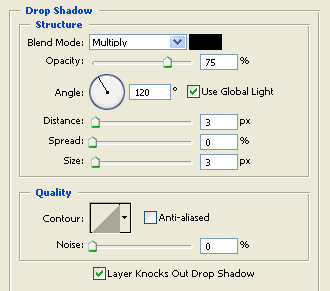
| Step 2 While still selected with your text layer, then simply go to Layer > Layer Style > Blending Options > Drop Shadow. You should then be able to enter in the details as showed below. |
 |
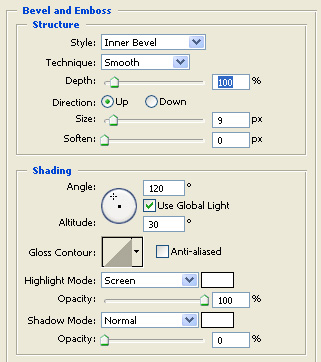
| Step 3 Now simply select the Bevel and Emboss, properties and enter in as shown below. |
 |
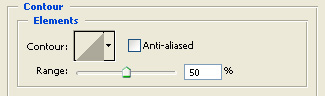
| Then select "Contor" and enter in the details below. |
 |
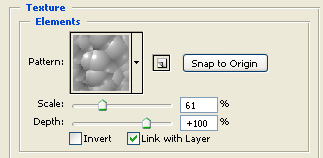
| Now select "Texture" and enter in the details below. |
 |
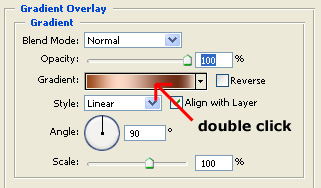
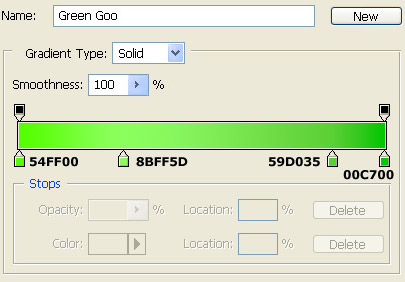
| Step 4 Select "Gradient Overlay". You will see a drop down menu with different types of gradients. Select the copper looking gradient and then double click it, which should then open up a new window. |
  |
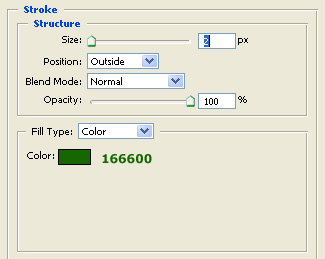
| Step 5 Select "Stroke" and enter in the properties as shown. |
 |
| Final Result This is what your result should look like. |
 |