

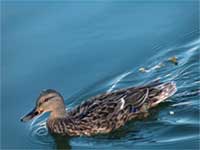
Simulate a long exposure photograph taken with a fog and star filter.
|
|
1. Open the image for editing. |
|
|
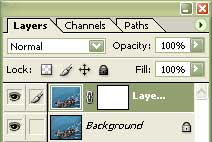
2. Duplicate the current layer (Ctrl+J) and add a layer mask (Layer> Add Layer Mask> Reveal All). |
|
|
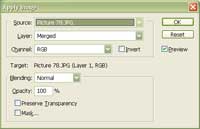
3. With the layer mask selected, use the "Apply Image" tool to apply the following properties:
Source: filename Click OK. |
|
|
4. Select the top layer that contains a layer mask and apply a "Diffuse Glow" (Filter> Distort> Diffuse
Glow) with the following properties:
Graininess: 0 Click OK. |
|
|
5. Duplicate the current layer (Ctrl+J). |
|
|
6. On the top layer, apply a "Motion Blur" (Filter> Blur> Motion Blur) with the following
properties:
Angle: 45º Click OK. |

|
|
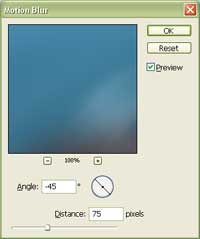
7. On the middle layer, apply a "Motion Blur" (Filter> Blur> Motion Blur) with the following
properties:
Angle: -45º Click OK. |
|
|
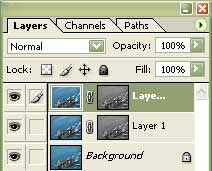
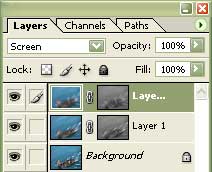
8. Set the top two layer's blending mode to "Screen". |
|
|
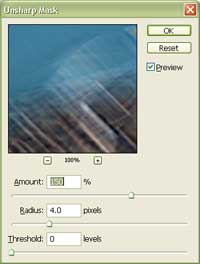
9. Use the "Unsharp Mask" to sharpen the top layer and apply the same filter to the middle layer (Ctrl+F+). |
|
|
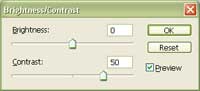
10. With the top layer's layer mask selected, increase the "Contrast" to "50" using the "Brightness/Contrast" tool (Image> Adjustment> Brightness/Contrast). Repeat this step for the middle layer's layer mask. |
|
|
11. Adjust the opacity of the top two layers to increase or decrease the strength of this effect. Rollover the image in this step to see the original image before this technique was applied. |
