

Change the weather of any photograph to a misty day.
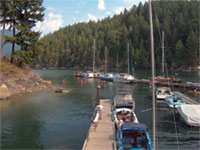 |
1. Open the image for editing. |
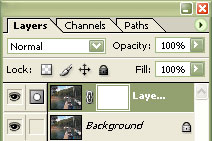 |
2. Create a new layer (Ctrl+Shift+N) and add a layer mask to the new layer (Layer> Add Layer Mask> Reveal All). |
 |
3. With the layer mask selected, use the "Gradient" tool (G) and draw a line from the horizon of the photo to the bottom edge using a black to white gradient. |
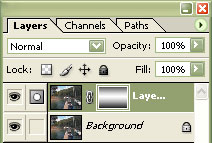 |
4. Invert the gradient (Ctrl+I) so that the layer looks like the image in this step. |
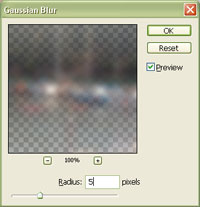 |
5. Select the top layer. Click on the layer's thumbnail to deselect the layer's mask. Apply a "Gaussian Blur. Set the "Radius" to a value that will blur most the details so that only the colours are visible. Click OK. |
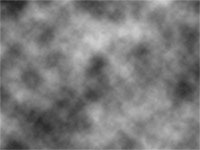 |
6. Create a new layer (Ctrl+Shift+N) and apply a "Clouds" filter (Filter> Render> Clouds). |
| 7. Transform (Ctrl+T) the "Width" to "400%". | |
|
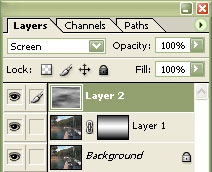
8. Set the current layer's blending moe to "Screen". |
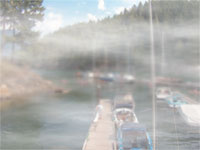 | 9. Decrease the "opacity" of the top layer to decrease the amount of fog. Decrease the "opacity" of the middle layer to decrease the amount of blur. Rollover the image in this step to see the original image before this technique was applied. |