
Add a carbon fibre pattern that wraps to the shape and form of a vehicle's hood.
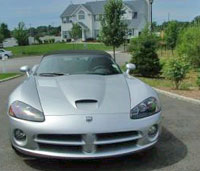 |
1. Open the image for editing. |
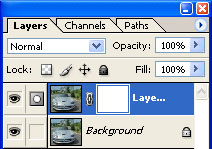 |
2. Duplicate the current layer (Ctrl+J) and add a layer mask (Layer> Add Layer Mask> Reveal All) to the new layer. |
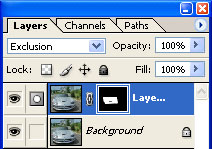 |
3. Set the layer's blending mode to "Exclusion" and with the layer mask selected, use the "Eraser" tool (E) to erase the areas around the hood. |
 |
4. Select the top layer (not its layer mask) and set the layer's blending mode back to "Normal". |
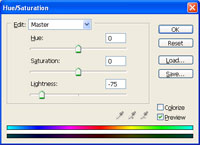 |
5. Use the "Hue/Saturation" tool (Ctrl+U) to lower the "Lightness" so that the image becomes dark but not black. |
 |
6. Create a new 200x200 pixels document with a white background. |
 |
7. Use the "Rectangular Marquee" too l(M) to select the top half of the canvas. Fill it with black. |
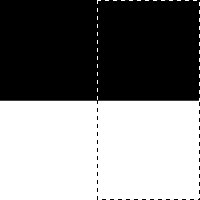 |
8. Use the "Rectangular Marquee" too l(M) to select the right half of the canvas. |
 |
9. Merge the layers (Ctrl+E). |
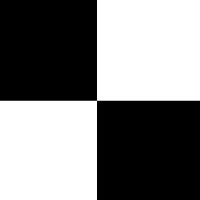 |
10. Invert the area within the selection (Ctrl+I). |
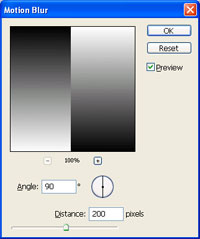 |
11. Delect (Ctrl+D) and use the "Motion Blur" tool (Filter> Blur> Motion Blur) to apply the following properties:
Angle: 90º
Click OK. |
 |
12. Double click on the layer "Background" and click OK. This will unlock the layer. |
 |
13. Add a layer mask (Layer> Add Layer Mask> Reveal All). |
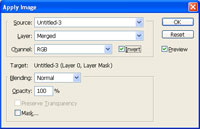 |
14. With the layer mask selected, use the "Apply Image" tool (Image> Apply Image) to apply the following properties:
Source: filename
Click OK. |
 |
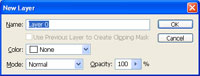
15. Create a new layer (Ctrl+Shift+N) above the current layer and merge down (Ctrl+E). When It asks if you want to apply the mask, click "Apply". |