

Pixels formed in a pattern and style similar to the effects used in 'The Matrix'.
 |
1. Create a new document with a white background. |
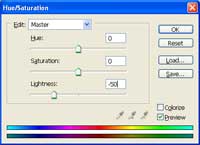 |
2. Use the Hue/Saturation tool (Ctrl+U) to reduce the lightness by -50. |
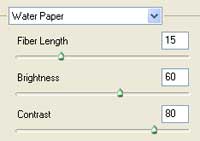 |
3. Add a Water Paper filter (Filter> Artistic> Water Paper) with these settings:
Fiber Length: 15
|
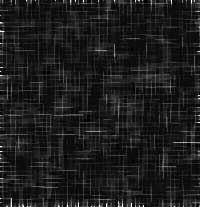 |
4. Increase the contrast by applying an Auto Levels (Ctrl+Shift+L). |
 |
5. Add a Maximum filter (Filter> Other> Maximum) with a radius of 1 pixel. |
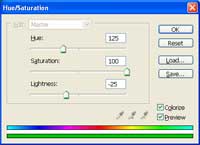 |
6. Colorize the image using the Hue/Saturation tool (Ctrl+U). These are the properties I used:
Hue: 125
|
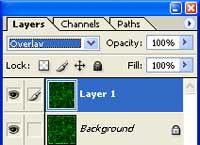 |
7. Duplicate the layer (Ctrl+J) then change the blending mode of the new layer to Overlay. |
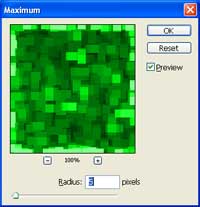 |
8. Add a Maximum filter (Filter> Other> Maximum) with a radius of 5 pixel. |
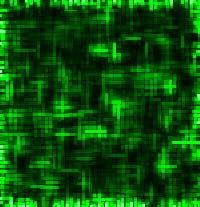 |
9. Here is the result that I got. |