 |
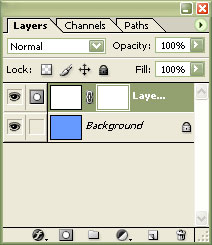
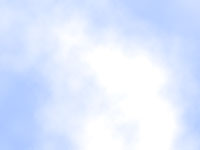
1. Create a new document (Ctrl+N), fill the "Background" layer with a blue that resembles a sky and create a new layer with a layer mask. |
 |
2. Apply a "Clouds" filter (Filters> Render> Clouds) in the top layer's mask. |
 |
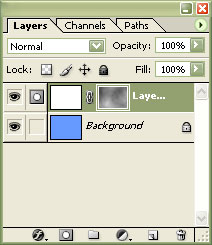
3. Duplicate the top layer (Ctrl+J) and apply a "Difference Clouds" (Filter> Render> Difference Clouds) in the layer mask. |
 |
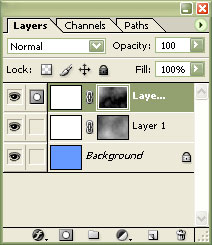
4. Duplicate the top layer (Ctrl+J) and apply a "Clouds" filter (Filter> Render> Clouds). |
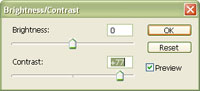 |
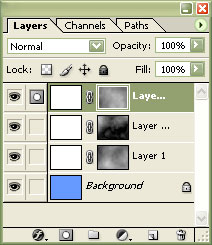
5. Use the "Brightness/Contrast" tool (Image> Adjustments> Brightness/Contrast) to the top layer's mask. Increase the contrast so that the clouds are more visible but not overexposed. |
|
6. Try to invert (Ctrl+I) the top layer to see a different version of the clouds. Rollover on the image in this step to see the effect of inversing the top layer. |
Her
Making Clouds
Added:Mar 28, 2005 Rating:

 Level: Beginner Software:
Photoshop
Level: Beginner Software:
Photoshop
Level: Beginner Software:
Photoshop