

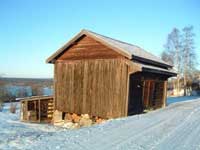
Reduce haze and increase contrast to the highlights of the image.
 |
1. Open the image for editing and duplicate the current layer (Ctrl+J). |
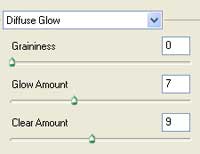 |
2. On the new layer, add a Diffuse Glow (Filter> Distort> Diffuse Glow) with the following properties:
Graininess: 0
|
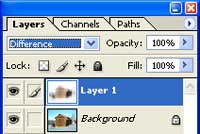 |
3. Change the blending mode of the current layer to Difference. |
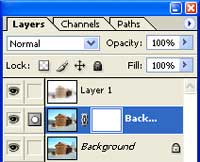 |
4. Duplicate the layer Background (Ctrl+J) and add a layer mask (Layer> Add Layer Mask> Reveal All) to the new layer. |
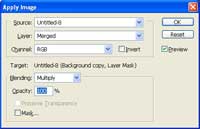 |
5. With the layer mask selected, use the Apply Image tool (Image> Apply Image) to apply the following properties:
Layer: Merged
|
 |
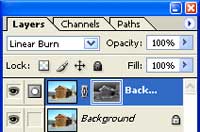
6. Change the blending mode of the middle layer to Linear Burn then delete the top layer. |
 |
7. To increase the effect, select the layer mask and apply an Auto Levels (Ctrl+Shift+L). |
 |
8. Rollover the image in this step to see the original image before this Photoshop technique was applied. |