

Traditional methods of increasing saturation increases saturation of the whole image. By using a layer mask, neutral areas such as rocks, cement and water will say neutral while the other areas are saturated.
 |
1. Open the image for editing. |
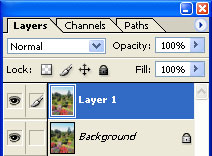 |
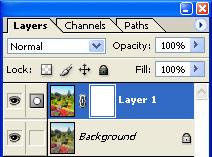
2. Duplicate the current layer (Ctrl+J). |
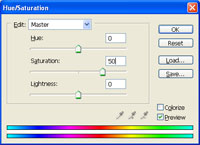 |
3. With the top layer selected, use the "Hue/Saturation" tool (Ctrl+U) to increase the "Saturation". |
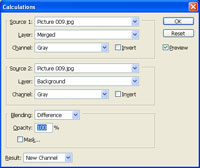 |
4. Use the "Calculations" tool (Image> Calculations) to apply the following properties:
Source 1: filename
Source 2: filename
Blending: Difference
Result: New Channel Click OK. |
 |
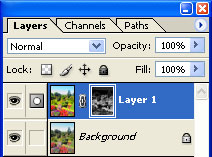
5. Add a layer mask (Layer> Add Layer Mask> Reveal All) to the current layer. |
 |
6. With the layer mask selected, use the "Apply Image" to apply the following properties:
Source: Filename
Click OK. |
 |
7. Apply an "Auto Levels" (Ctrl+Shift+L) to the layer mask. |
|
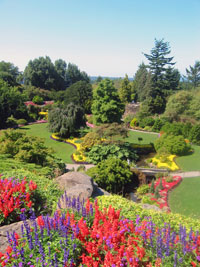
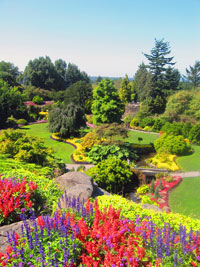
8. To reduce the amount of saturation, reduce the opacity of the top layer. Rollover the image on the left of this step to see the original image before this technique was applied. |