
Remove dithering from images and GIF files.
 |
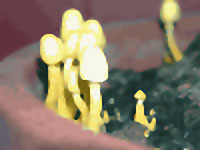
1. Open the image for editing. For this tutorial, select a dithered image. |
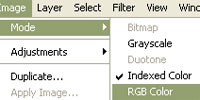 |
2. Convert the image to "RGB Color" (Image> Mode> RGB Color) if it isn't already. |
 |
3. Apply several "Despeckle" filters (Filter> Noise> Despeckle) until all dithering is removed. Press "Ctrl+F" as a shortcut to apply the previous filter again. |
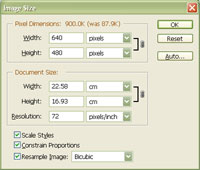 |
4. If the image's width or height is not at least 480 pixels, use the "Image Size" tool (Image> Image Size) to increase the image's width or height to 480 pixels. Checkmark "Constrain Proportions" and "Resample Image". Set the "Resample Image" method to "Bicubic" or "Bicubic Smoother". Click OK. |
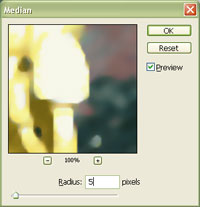 |
5. Apply a "Median" filter (Filter> Noise> Median) with a "Radius" large enough to remove all jagged edges. Click OK. |
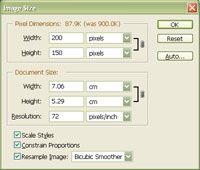 |
6. Decrease the image size back to its original size using the "Image Size" tool (Image> Image Size). Resample the image using the "Bicubic Smoother" method. |
|
7. Apply a "Sharpen Edges" filter (Filter> Sharpen> Sharpen Edges) once or twice to sharpen the edges a little. There's no more dithering in the image now. Consider using this technique when enlarging dithered images. Rollover the image on the left of this step to see the original image before this technique was applied. |