


Taking photos in the fog usually results in an underexposed, low contrast image. In this tutorial, you will learn how to use the levels and brightness/contrast tool to remove the fog and restore the details and colours in the photograph.
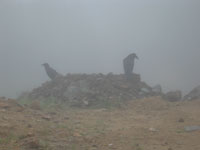 |
1. Open the image for editing. For this tutorial, select a photograph with a low contras.t |
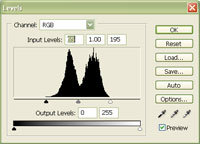 |
2. In the Levels window (Ctrl+L), drag the white and black Input Sliders to the edge of the first group of pixels on each side. Click OK. |
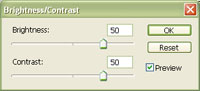 |
3. Use the Brightness/Contrast tool (Image> Adjustments> Brightness/Contrast) to increase the brightness and contrast of the photograph. Click OK. |
|
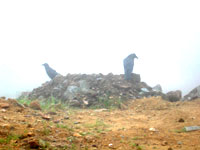
4. The details of the photograph are now revealed. Rollover the image on the left of this step to see the original image before this technique was applied. |
Fog decreases the contrast and brightness of the photo. By correcting the levels and increasing the brightness and contrast, the details in the photograph are restored. When shooting photos in the fog, try not to use the flash as the flash will reveal the texture of the fog.