

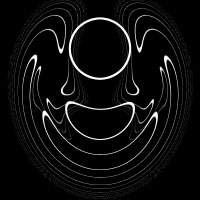
A geometric kaleido pattern with a liquified texture.
 |
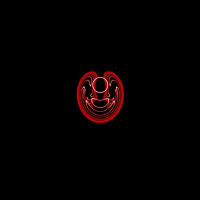
1. Create a new 1000x1000 pixels square document with a black background. Use the "Marquee" tool to make a selection of a circle and fill it with the colour white. |
 |
2. Contract the current selection (Select> Modify> Contract) by 10 pixels. |
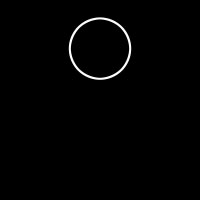 |
3. Delselect and move the circle near the top. |
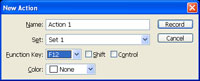 |
4. In the "Actions" pallet (Window> Actions) create a new set and a new action and select a function key for it. Click OK. |
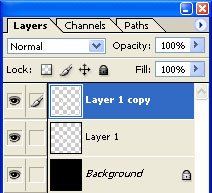 |
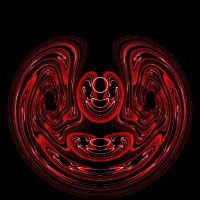
5. Make sure that the record button in the "Actions" pallet is recording. Duplicate the current layer (Ctrl+J). |
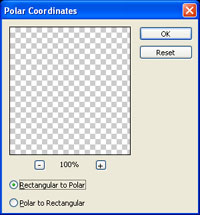 |
6. Use the "Polar Coordinates" filter (Filter> Distort> Polar Coordinates), select "Rectangular to Polar" and click OK. |
 |
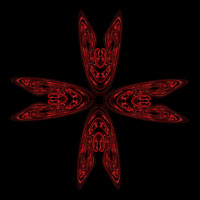
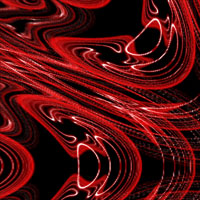
7. Stop recording the action. Apply the action you've created several times so that your image looks like the image in this step. Press the "Function Key" you've specified in step 4. |
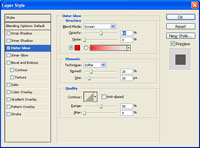 |
8. On any of the new layers created, apply an "Outer Glow" layer style (Layer> Layer Style> Outer glow) with the following properties:
Blend Mode: Screen
Click OK. |
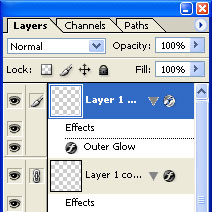 |
9. Link all the layers except "Background". Copy the current layer's layer style (Right mouse click on layer style and select "Copy Layer Styles") and paste it into the linked (Right mouse click on the layer style and select "Paste into linked"). |
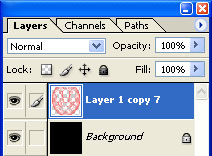 |
10. Merge linked (Ctrl+E). |
 |
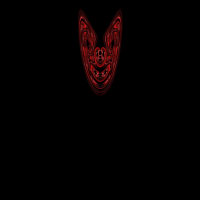
11. Use the "Canvas Size" tool (Image> Canvas Size) to apply the following properties:
Width: 300 percent
Click OK. |
 |
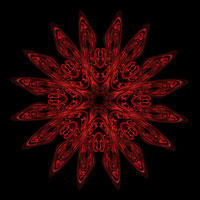
12. Apply the action you've created several times so that your image looks like the image in this step. Press the "Function Key" you've specified in step 4. |
 |
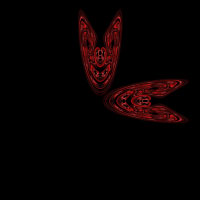
13. Link all of the layers except "Background" and merge linked (Ctrl+E). |
 |
14. Use the "Transform" tool (Ctrl+T) to scale the object so that it looks similar to the image in this step. |
 |
15. Duplicate the current layer (Ctrl+J) and use the "Transform" tool (Ctrl+T) rotate it 45º. Position it 45º from the layer below it. |
 |
16. Repeat step 15 for the bottom and left sides. |
 |
17. Link all of the layers except "Background" and merge linked (Ctrl+E). |
 |
18. Duplicate the current layer (Ctrl+J). |
 |
19. Use the "Transform" tool (Ctrl+T) to rotate the new layer by 45º. |
 |
20. Here is a cropped area of a high resolution version. |