Often you will find that photographers offer a "star-appeal" or "dreamy" effect for their photographs. In this tutorial you will learn how to create a "star-appeal" or "dreamy" effect you can use for your own photographs.
| 1 |  | Open the image for editing. |
| 63 | ||
| 2 | 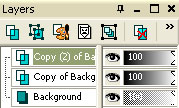 | Duplicate the "Background" layer twice (Layer> Duplicate) so that you have a total of three layers. |
| 3 | 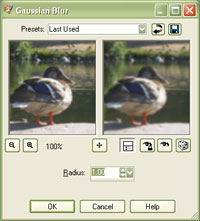 | On the top layer, use a Gaussian Blur (Adjust> Blur> Gaussian Blur). Select a radius large enough to blur the details without losing its shape. Repeat this step for the middle layer. |
| 4 | 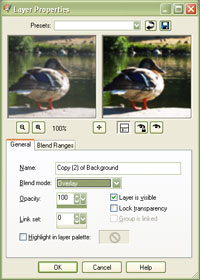 | Using the "Layer Properties" tool (Layer> Properties), set the blending mode of the top layers to "Screen" and the middle layer to "Overlay". Decrease the "Opacity" of both layers to decrease the effect. |
| 5 | 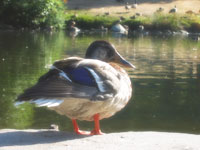 | The colours of the image are blurred and the lumosity remains sharp. Rollover the image in this step to see the original image before this technique was applied. |
The fog effect is
a commonly used effect to create a morning look to photographs. Unlike
other methods of creating a fog effect, this method uses an extra
overlay layer to prevent an overexposed image.