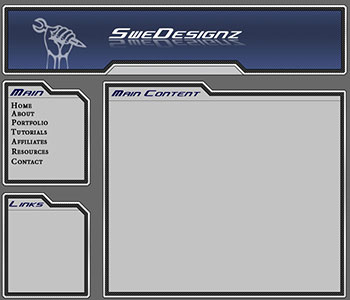
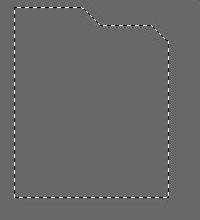
1. Begin with a new file, 700x600 and with #686868 as your background color. Then create a new layer in the layers palette, now take the Polygonal Lasso Tool and make a shape similar to the one below. ( Click for larger view )
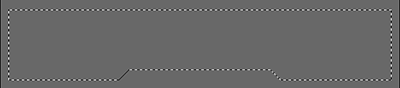
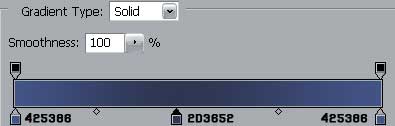
2. Go to Select>Modify>Expand and set the Expand By to 8 pixels. Then select the Gradient Tool and make a gradient as the image below shows.

3. Now when you have made the gradient shown above draw the gradient from top to bottom. ( Click for larger view )

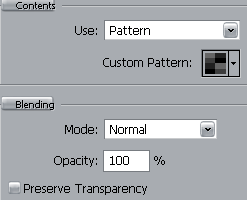
4. Create a new layer, then go to Select>Modify>Contract and set the Contract By to 4 pixels. Then go to Edit>Fill and apply this settings.
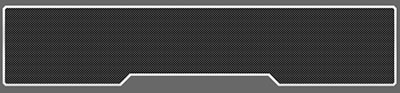
5. Then once again create a new layer and go to Select>Modify>Contract but this time set the Contract by to 7 pixels. Then take the Gradient Tool and make a gradient like the image below.
6. Now draw the gradient from top to bottom. ( Click for larger view )
7. Then go to Layer>Layer Style>Stroke and apply the settings shown on the image below.
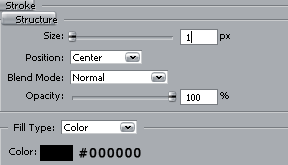
8. Apply the same settings shown above on layer 1. Then create a new layer, move that layer below layer 1, now take the Rectangular Marquee Tool and draw out a rectangle like this. ( Click for larger view )

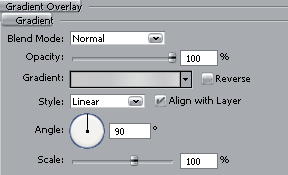
9. Now fill the rectangle with black, then right click on the layer and choose Blending Options, then apply this settings.
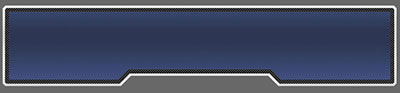
And now should it look something like this. ( Click for larger view )

10. Create a new layer, then take the Polygonal Lasso Tool and make a shape similar to the one below. ( Click for larger view )
11. Now go to Select>Modify>Expand and set the Expand By to 8 pixels. Then take the Gradient Tool and use the same gradient shown in step 2, draw the gradient from top to bottom. Then create a new layer go to Select>Modify>Contract and set the Contract By to 4 pixels. Then go to Edit>Fill and use the same pattern as we did in step 4. Then once again create a new layer, go to Select>Modify>Contract and this time set the Contract By to 7 pixels, then right click inside the shape and choose Fill, fill the shape with #C3C3C3. Then repeat step 7 on layer 6 and layer 8. ( Click for larger view )
12. Then duplicate the shape you did in the previous step and use the Move Tool to move the shape in position. Now time to make the content box, create a new layer, take the Polygonal Lasso Tool and make a shape like this.
13. Then repeat step 11. And now should it look something like this.
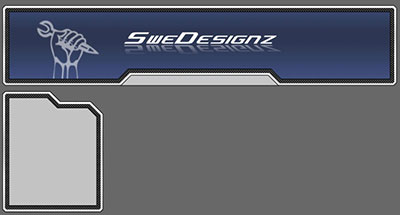
The only thing that's left now is to add some text. This is what I came up with. ( Click for larger view )