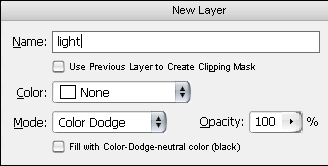
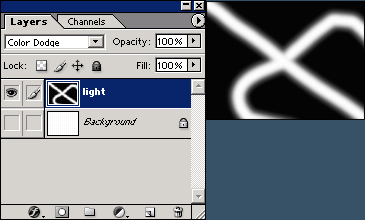
1. Create a new document (Ctrl+N), for example use 640x480, that way the image will load easier when you are Liquifying Create a new layer (Ctrl+Shift+ N) and name it light. Use these settings:
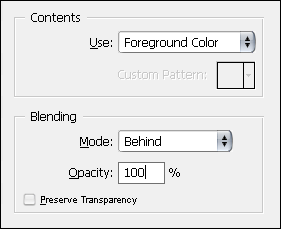
2. Make sure that your foreground color is pure black and your background color is pure white. Select your light layer and go to EDIT > FILL and use these settings:
3. Select the Airbrush Tool and set the size of the brush to 65. Make sure the color of the brush is set to white. Click the eye icon besides the Background Layer so you hide it and only the light layer is shown. This will result in a black background. Draw a shape (try some different ones) but for now make one that looks like a fork of a devil
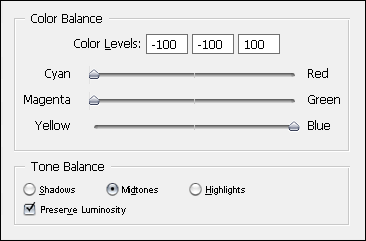
4. Filter > Blur > Gaussian Blur and use a blur radius of 40 pixels Image > Adjustments > Color Balance and use the settings as show below:
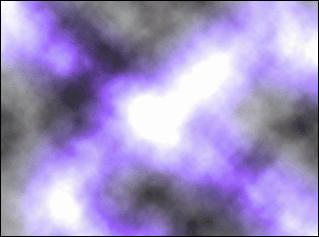
5. Select your Background Layer (make sure the eye is back so all the layers are shown) and click Filter > Render > Clouds, ahh yes, I can see your eyes twinkle by looking at the effect you just created. Now lets do the final, the actual liquifying part to give it that extraordinary special touch
6. Go to Filter > Liquify (Shift+Ctrl+X), use a large or small brush size, I mostly use rather large brushes. Now draw a couple of "lines", you will see that your image liquifies. When you are satisfied hit OK and let your PC work for a second, the faster your pc is the better. Remember that slower pc's will have more trouble to liquify large images
7. Now you can leave it as it is or you can play around with the Hue/Saturation (Ctrl+U) on both the layers (background and light layer)
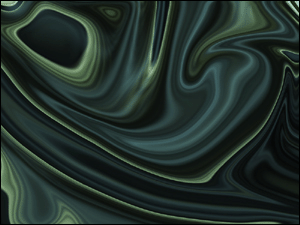
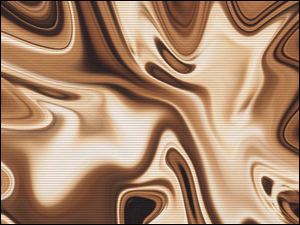
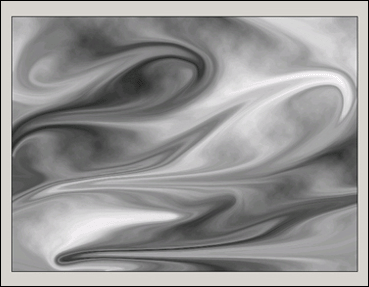
Here are a few examples of what i accomplished: