

In this tutorial im gonna show you how to create a contentbox and also show you how to make it expand.
1. Begin with a new file, 300x250, with #666666 as your background color. Then create a new layer in the layers palette.
2. Then take the Rounded Rectangle Tool and draw out a rectangle as the image below shows.

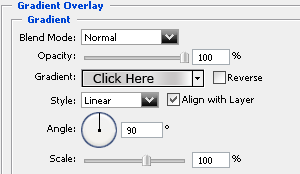
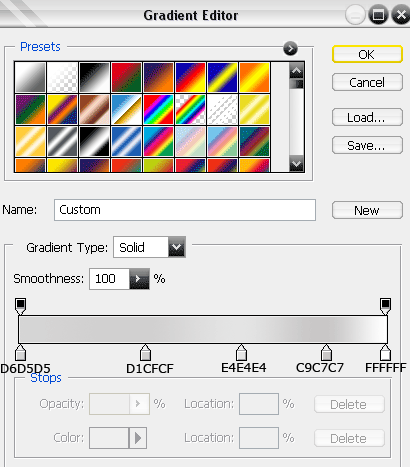
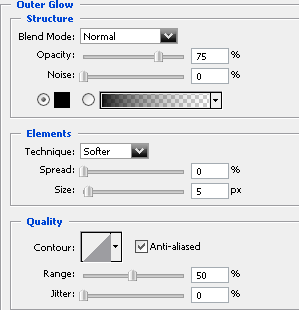
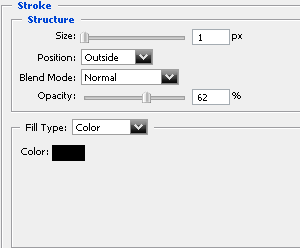
3. Now head over to the layers palette and right click on layer1, choose Blending Options and apply this settings. ( Click for larger view )
Now should it look something like this.

4. Now go to Select>Modify>Contract and contract by 6 pixels, then press delete.

5. Now when your image should be selected create a new layer and fill it with #333333, and that´s it for the design of the contentbox, this is what I end up with.

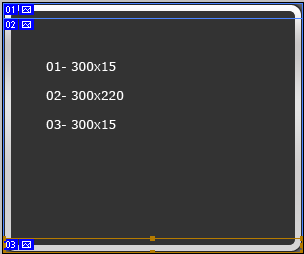
Now it´s time to slice the image, take the Slice Tool, below you can see how I sliced my image. ( Click for larger view )
And here is the code to make it expand.
| <table width="300" border="0" cellpadding="0" cellspacing="0"> <tr> <td> <img src="/img_articles/4555/01.gif" width="300" height="15" alt=""></td> </tr> <tr> <td background="02.gif" width="300"> <p align="center">Here goes your content!!!</p> </td> </tr> <tr> <td> <img src="/img_articles/4555/03.gif" width="300" height="15" alt=""></td> </tr> </table> |
That´s it, below is an example.
| |
|
Here goes your content!!! Here goes your content!!! Here goes your content!!! Here goes your content!!! Here goes your content!!! Here goes your content!!! |
| |