

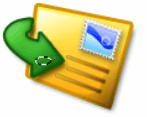
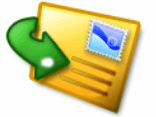
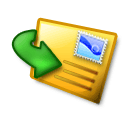
In this lesson, you will learn how to draw an icon that appears to be made of transparent plastic. You’ll use the contacts icon as the foundation for this work.
1. Create a new document which is 271-180 pixels large.
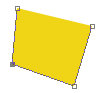
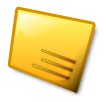
2. Set foreground color #F0D416. Then choose the Pen Tool (P) in the tools panel.
Then in the upper left corner, in the Options panel, choose Shape layers, and begin drawing an envelope.

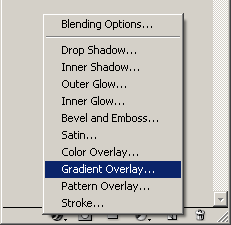
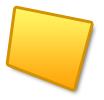
3. Then add the gradient effect. To do this, choose the gradient overlay effect in the layer style (the
![]() icon in the layers panel) panel.
icon in the layers panel) panel.
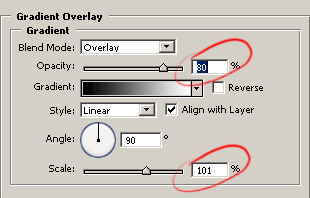
Set Blend Mode Overlay, Opacity 80% and Scale 101%.
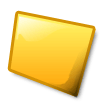
We should get an image similar to this one.

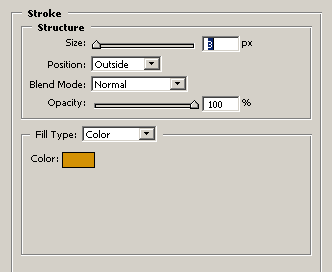
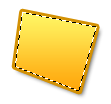
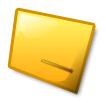
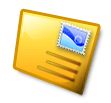
4. Next you should add effects, such as Drop Shadow and Stoke.
In Drop Shadow set the following parameters:
- Blend Mode: Multiply;
- Opacity: 66%;
- Distance: 5px;
- Spread: 0%;
- Size: 5px.
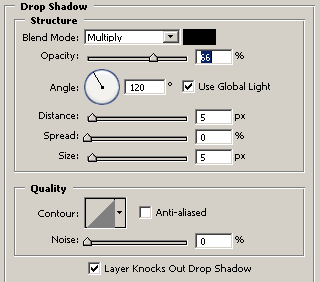
In Stroke, set the Size at 3 px and choose the color #D39104.
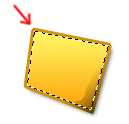
As a result we should get something like this image.
5. Next we will begin to add gradients for a large-sized envelope. Select the image in the layer by clicking Ctrl+left click on the layer in the layers panel. Then create a new layer Layer>New>Layer... (Ctrl+Shift+N).
6. Next select Lasso Tool(L) and holding Alt, cut away the part in the selected area,(on Lasso Tool while clicking ALT near the Lasso icon will appear minus sign
![]() , in such way the selected portion can be cut away, or added while clicking SHIFT).
, in such way the selected portion can be cut away, or added while clicking SHIFT).
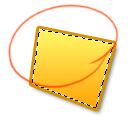
7. This is required in order to make the shadow deeper. Set foreground color #996633. Choose Gradient Tool (G). In the options panel select Linear Gradient. Then in Gradient Editor select Foreground to Transparent preset. Make a gradient effect for this corner, for example.
8. If there is a shadow on the envelope, then there should be light as well. Now repeat steps 5-7, this time making the selection in the upper left corner, using #FFFFFF as the foreground color and adding a gradient in the direction shown in the picture below.
Here’s how it should look.
9. Next let's draw stripes to simulate text on the envelope. This is a stylized picture, so you should give the text image a rectangular shape. Choose Rectangle Tool (U)
 and make a rectangle.
10. Next add Gradient Overlay using these parameters:
- Blend Mode: Overlay;
- Opacity: 54%;
- Scale: 100%;
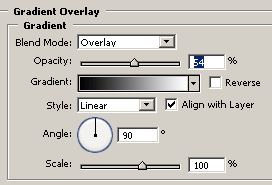
Add Stroke effect, using these parameters:
- Size: 1px;
- Color: #C2901B;
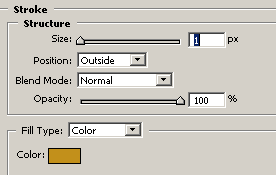
Next it is necessary to turn the object. To do this, we use hotkeys, ctrl+T, and place it in the appropriate corner, clicking Enter.
We got this image as a result.
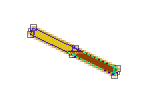
11. We need to multiply our rectangle. To do this, choose the Move Tool (hotkey V) instrument and clicking the Alt key, drag the object lower with the mouse. Then reduce its size by clicking ctrl+T.
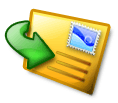
In the end we should get something like the following image.
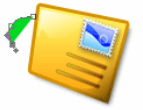
12. Next add a stamp (you may learn how to make it here or download ready version here), give it a form using Free Transform Tool (Ctrl+T), and add the Drop Shadow effect. Inside the stamp’s outline we can make an image, using curves and gradient overlay.
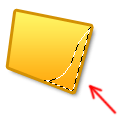
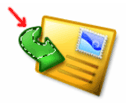
13. Next draw an arrow as shown below. Set foreground color #00D91F. Using the Pen Tool draw the shape of the arrow, as shown on the image.
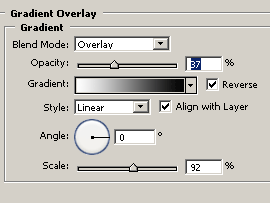
14. Now let's add volume. You should add a series of effects, such as Gradient Overlay, Inner Shadow, Bevel and Emboss, Stoke, Drop Shadow.
Use the following settings for Gradient Overlay:
Blend Mode: Overlay;
Opacity: 37%;
Scale: 92%;
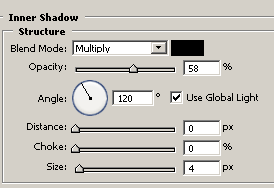
These settings for Inner Shadow:
- Opacity: 58%;
- Distance: 0%;
- Choke: 0%;
- Size: 4 px;
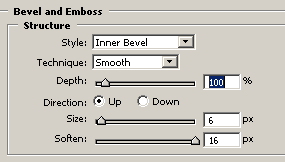
Next in Bevel and Emboss, set the parameters:
- Depth: 100%;
- Size: 6 px;
- Soften: 16 px;
In Stroke set:
- Size: 2 px;
- Color: #0A5C00;

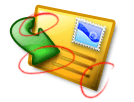
We got the following arrow as a result.
![]()
15. Create a new layer and draw a small white circle with the Brush Tool (B).
In the upper panel in the Filter setting, choose Blur-Gauassian Blur, setting the Radius at 1.4 px.
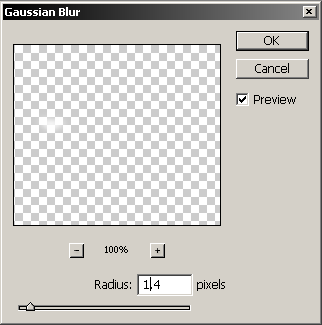
Then in the Layers panel, set Overlay, and you’ll get the following lighting effect.
16. The next step will be the creation of highlights. For this we should select the arrow in the layer (ctrl+click) in the layers panel. Using the Lasso (L) tool and clicking Alt
![]() , remove all extra details.
, remove all extra details.
Choosing Gradient Tool (G), we make a white gradient in this corner.
17. Next using the Lasso Tool and Fill, we can make a gradient of a small transparent shadow, to add more depth.
Choosing the Lasso (hotkey L), selecting the area, we can add the chosen gradient effect.
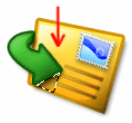
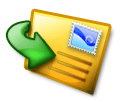
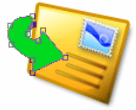
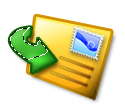
We can make other gradient effects in exactly the same way. The result is an icon like this, made of transparent plastic.
See additional examples on the practical use of such elements:
 
 |
| Plastic examples |
