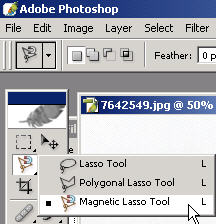
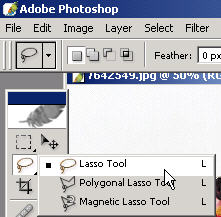
Another way to get a selection is with the magnetic lasso tool. This tool I do not use at all but to create a tutorial like this.
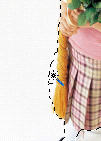
It can come in handy if you have a VERY distinct subject that really stands out from a common color background; hence, a photo like this (from my Photos.com collection). To use it just click at a start point along the object that you want to select and carefully drag it along and it should do a good job of following to the contour of your object (hopefully).


Fortunately you do have other tools to help make a moderate selection even better (covered in other tutorials and extensively in the Basic Photoshop DVD training). Work your way all around to the start point to close off the selection.
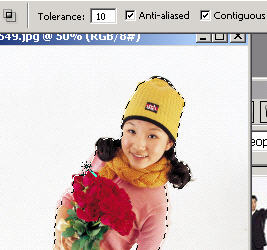
Hopefully your magnetic lasso-ing came close to a good selection without much effort. Cowboy.

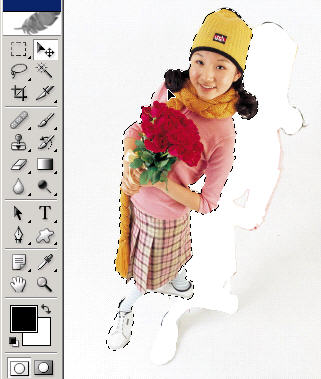
Use the other tools such as magic wand on 'subtract from selection' here to deselect this extra white space.
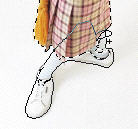
Fix any other areas that you feel need to be modified to get the selection. Even in this case the magnetic lasso doesn't do a great job. Don't even think of using it in complicated selection scenarios! Here I'm doing add to selection with the magic wand on a low tolerance because light pink is close to white.
You have more control with the magic wand and regular cowboy rope (lasso) in this case to further modify the selection.
Here I'm drawing with the lasso to add her complete shoes to the selection. Note the little plus sign which means 'add to selection'.
Once you've made your selection, use the moVe tool to drag your selection around. Now we'll take things a little further in the next tutorial...only from BasicPhotoshop.com!