

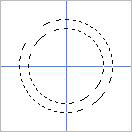
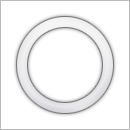
Open a new document. I've chosen 130x130 px with white background. Hit Ctrl + R on your keyboard to bring the rulers. Grab Move Tool and pull out a line from the vertical ruler. Place the line on the middle. Do the same with the horizontal ruler.
Create a new layer and grab Elliptical Marquee Tool and place the mouse in the middle of the document. While you hold Shift and Alt down, you make a cirkel.
Now we have the selection of a cirkel, but we want the middle removed. Place the mouse on the middle again but hold down Alt before you make the new selection. While you make the new selection, you stop holding Alt down and then hold down Shift and Alt (again). The new selection have to be smaller than the old selection!
Set the foregroundcolour to #EEEEEE and backgroundcolour to #CFCFD3. Grab Gradient Tool (linear) and fill out the selection. Remove the selection (ctrl + d).
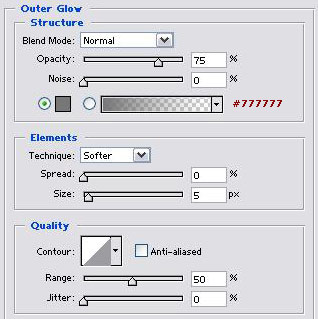
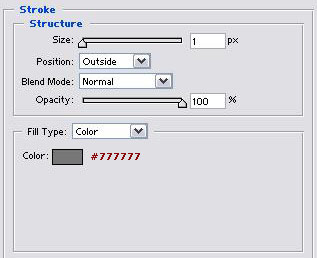
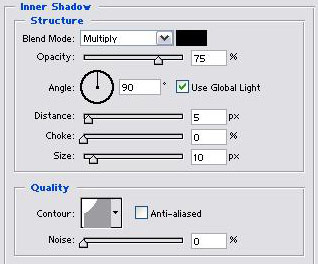
Go to Blending Options (layer > layer style > blending options).
Create a new layer and grab Elliptical M. Tool. Make a new selection with Shift and Alt again. The new selection has to be bigger than the hole in the first cirkel. Set the foregorundcolour to #769E00 and backgroundcolour to #3A4E06. Grab Gradient Tool (linear) and fill the selection. Remove the selection (ctrl + d).

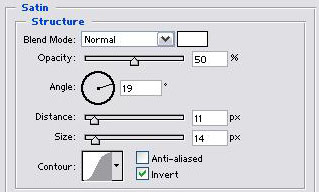
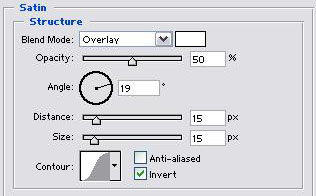
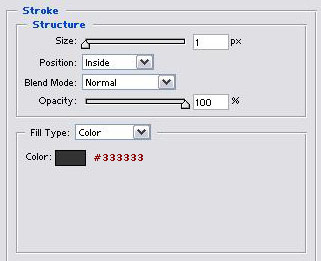
Go to Blending Options
Ctrl + click on the green layer and go to Select > Modify > Contract and set it to 5 px. Hit D on the keyboard and then X. Grab Gradient Tool (linear) and set it to "Foreground to Transparent" in Options Bar.

Pull a line from the top of the selection and down. Not too much! Remove the selection.
You are finish.