

1. Have all the images you want in the gallery ready to go in a folder. Make sure any editing is done already, such as resizing, clean-up, putting logos on, etc.
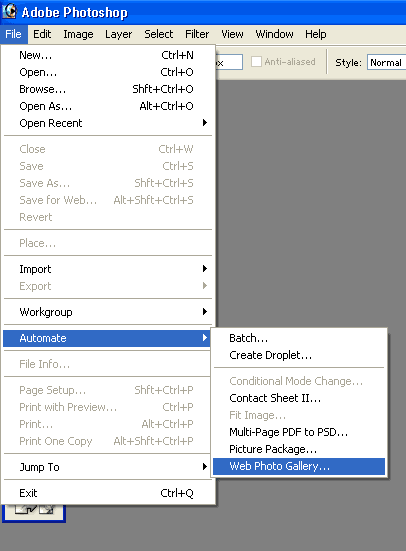
2. From the Photoshop menu, choose File, Automate, Web Photo Gallery.
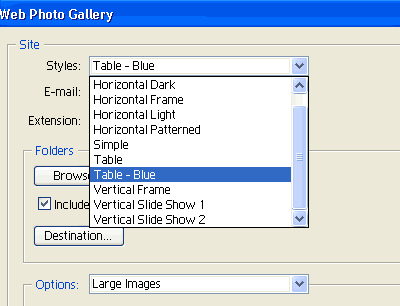
3. Choose one of the "Presets". They have a few predefined gallery layouts. Choose one.
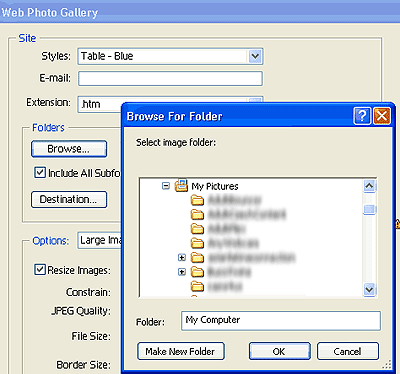
4. Under Folders, press the Browse button to navigate to the folder where your photos are.
5. Press the Destination button to choose the folder you want the gallery to go.
Set this folder up in advance and make it a different one than where the originals are, or part of the automation process will be defeated when you have to keep pressing a button to overwrite photos.
6. Press OK and Photoshop goes to work making all the thumbs, creating the gallery with links to the next page when the first one fills up. It makes an HTML page for each large pic that links from each thumbnail.
An added benefit of linking to a page rather than the image alone, is that you can then have more pages to optimize for the search engine spiders to crawl.
To really take advantage of this feature, customize one of the Presets so it has the look of the rest of your site.
To do this, you will have to edit the HTML pages found in:
Programs/Adobe/Photoshop7.0/Presets/WebContactSheet