1
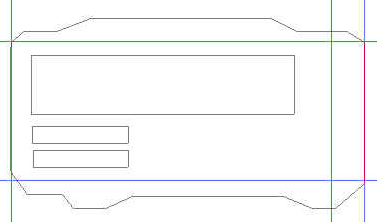
To start with, draw a simple layout of your skin, by using the pen tool. Only use the straight lines by clicking once to make the anchor points. Use rectangular shape tool to make rectangles inside your skin. (Tip: Press Ctrl+R and drag out the grid lines to help you draw the layout).
2

Now go to yours Paths window, right click on your "Work Path" and choose "Make a Selection", use default value of 0px and click OK. Go ahead and save your selection by going to Select>Save Selection.. Name your selection "Interface" and click OK. Now Press Ctrl+D (Mac: Command+D) to deselect your selection.
3

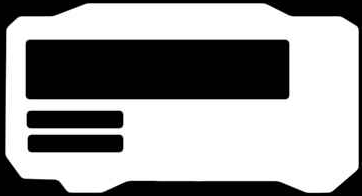
Go to your Channels window, and select your interface channel, your skin should look somewhat like the one above (black and white). Now we're going to round up the corners.
4

To round up your whole interface a little go to Filter>Blur>Guassian Blur and use 2px for the blur radius, click OK.
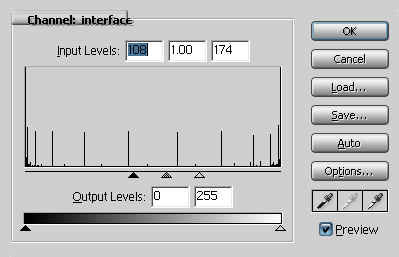
5
To remove the blur and make the corners round we need to adjust the Levels. Press Ctrl+L (Mac: Command+L) to adjust the levels. Move the right and left little arrows to the middle as illustrated below.