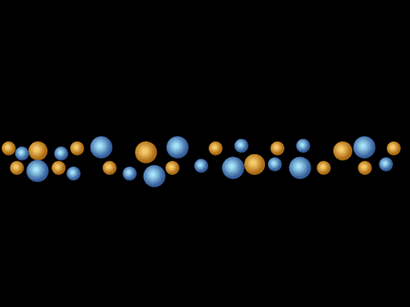
Start a new document 800x600. Fill the background with black
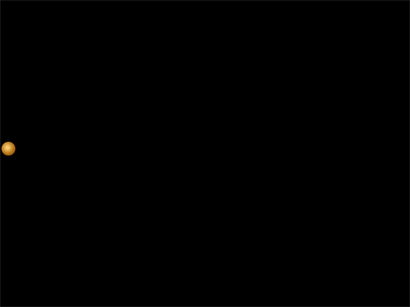
Now use the eclipse shape tool and create a small round shape about 30x30px.
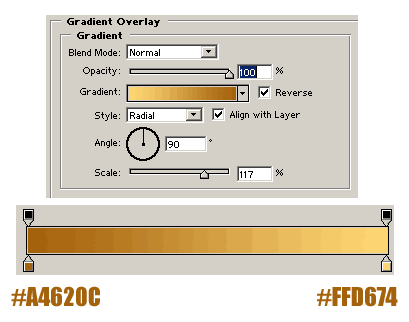
Then apply the following Gradient: Layer->Layer
Style->Gradient overlay:
Position this shape about half way down the image.
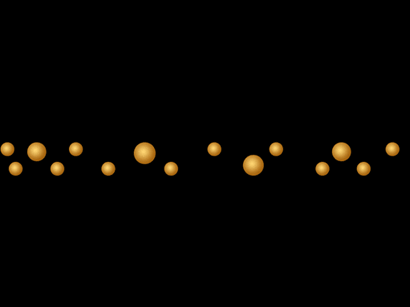
Now Duplicate this shape and position it horizontal to the original, and down by about 50px. will this area with these shapes. Also, resize several of them to be bigger than the other so you have a mixture of larger and smaller shapes.
Now use the ellipse shape tool again and create another circle like before, this time though, apply the following gradient colors instead (same settings as previous gradient).

Now repeat the 2nd step above to duplicate these blue shapes and resize to make big and small sizes. fill your image so it look similar to below.
Now, hide the background layer so its not visible.
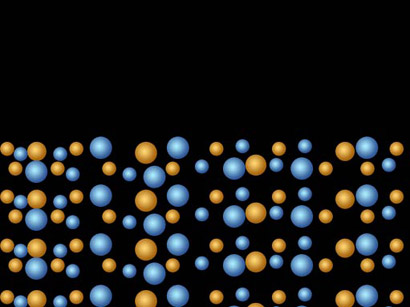
- Now go to Layer->Flatten Image
- Then Image->Rotate Canvas->90CW
- Then Filter->Stylize->Wind:
Method: Wind Direction: From
the Right
- Then Filter->Stylize->Wind:
Method: Wind Direction: From
the Left
- Press CTRL+F to reapply the filter.
- Then go to Image->Rotate Canvas->90CW
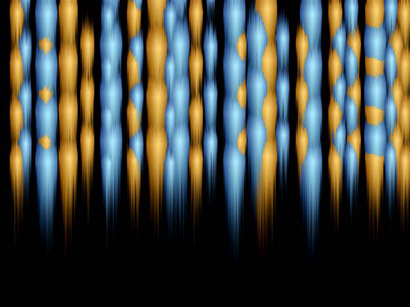
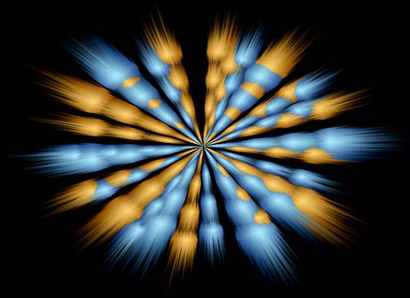
Now go to Filter->Distort->Polar Coordinate > Rectangular to Polar.
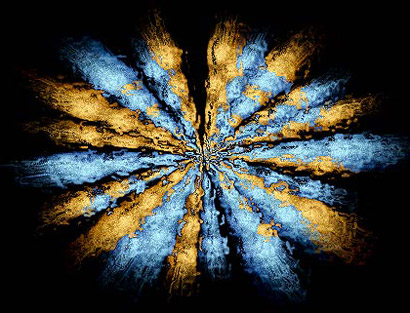
Now duplicate this layer, then go to Filter->Distort->Ocean
Ripple:
Ripple Size : 13 - Ripple Magnitude:
9
Now set the layer blending mode to "Screen". and opacity to 80%.
Then duplicate this layer (the layer you just duplicated). and set the blending mode to "Dissolve", and opacity to 70%
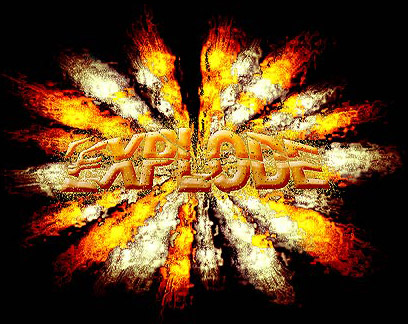
Here is mine after adding some text
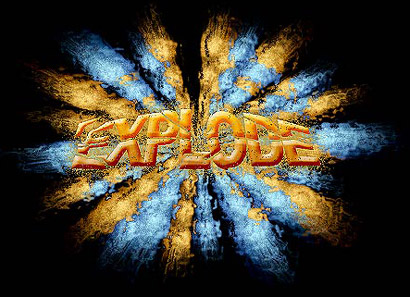
And After applying Image-> Adjustment ->Color Balance. to the explosion layer.
click here to view hi-res version | click here to download .psd file