


Welcome again to my tutorials. In this simple one I'm going to show you all the way I've do the applications interfaces or "skins" using Photoshop. Remember, you can change the methods and values that I use here, working in your own style. You can find the styles for PS 7.0 that I used for this here. Just click and with the rigth button of your mouse, choose "save target as..."
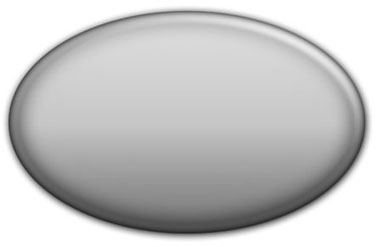
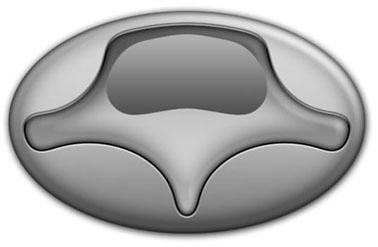
1. The Base
With a new file in blank, make a new layer and in this, create an oval and fill it with black. Center it, and add the "soft metal style".
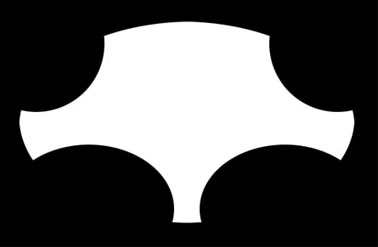
2. Internal shape
Make a selection of the oval, and reduce it 15 pixels. Now take out some parts, making the image more interesting. Copy the entire layer, and paste this into a new alpha layer.
3. Blur
In the alpha layer, apply a gaussian blur of 15 px.

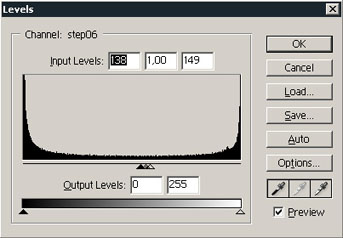
4. Levels
Then hit Ctrl+L, and in the levels box, use the settings I show here in the image. Copy the alpha channel, and paste the image into a new layer ( standard layer).
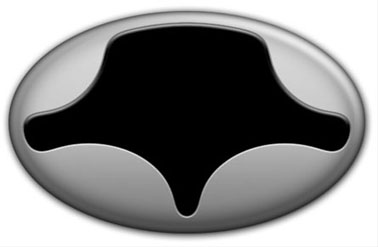
5. Round corners
The trick with the alpha results in an image with some rounded corners, very nice and with this style, better! Well, we need to select the shape again (Ctrl + mouse click) contract the selection a bit and create a new shape in a new layer.
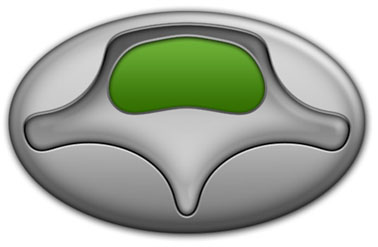
6. New shape
In the new layer, we need to fill the selection and apply the same style of the "base" but only changing the direction of the gradient fill to inverse. This change increases the effect of bevel here.

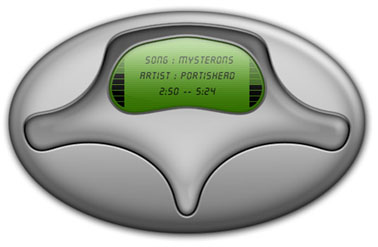
7. Display
Now, in a new layer we draw a shape for our display and make it more rounded using the "alpha trick". Again, I fill this one with a gradient, inverse to make more effect.
8. Adding color
One more layer to create the display: A gradient (I like this green tones) and an inner shadow. I've added here some little lines to give the "scan effect".
9. Display details
Adding the rest of the display details: The text, some lines for the volume and equalizer... Whatever you want. It's almost done...
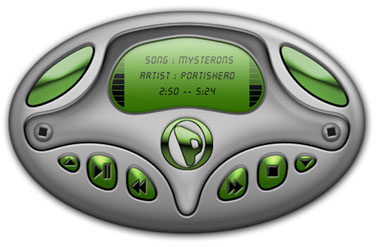
10. Final details
Well... Now, the rest are add some details like buttons, screws and stuff like that... And of course, a logo if you want. Remember the use of the "alpha trick" and the styles that give cool final effects.
Ok folks, here we finish this one. Remember to practice and take some time for experiment. At this time, my "interfaces" are just plain images, if you want to use it to create some "skin", please let me know.
God Bless you all!