


This series of tutorials is going to be about various simple techniques used in Skinning models, focussing on details and textures used to create metallic skins. One of the techniques is to use photo reference and overlay it over the base colour, paint in your details over that. Anyway theres various techniques and these are by no means the only way to do things, but I hope they will point you in the right direction ;-)

Textures
Using textures is easy enough but you will get the best out of em by playing with the various LAYER settings, BRIGHNESS/CONTRAST, BLUR, mixing several textures together etc, Have Fun ;-)
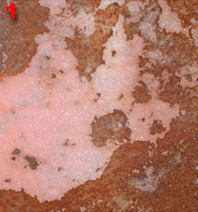
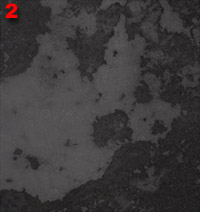
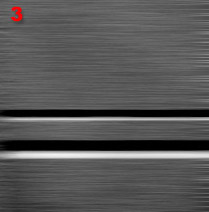
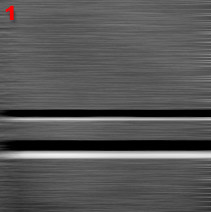
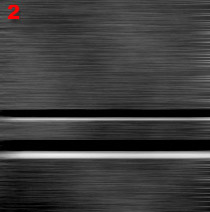
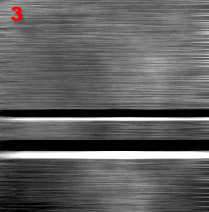
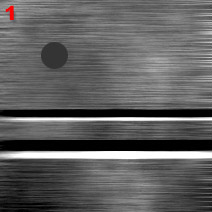
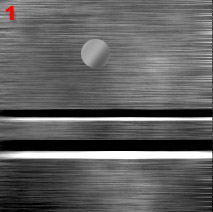
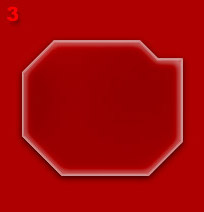
1. Using a part of a photo of some metal I took, I pasted it on a new layer over a black background.
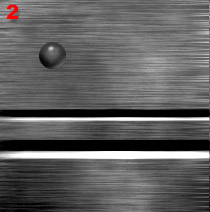
2. Desaturated it to make it grey, and took down the opacity of the layer.
3. Flattened it and using the Dodge and Burn and holding SHIFT to constrain it to a straight line across, added in some highlights and shadows.
4. Added some shadows and highlights in the holes, overlayed a couple of red stripes with the opacity set low and painted in various details. This is just a simple 10 minute example showing how to use an overlayed texture.

Noise
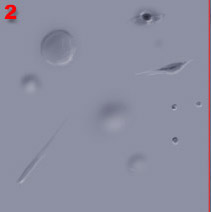
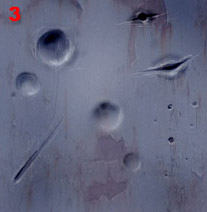
Here are a few techniques using the Noise Filter, Blur, Texture>Grain>various settings, clouds. The other thing is I'm doing all these at low-resolution, so at higher res you can get in more detail etc. These kind of textures are good for various parts of guns etc.
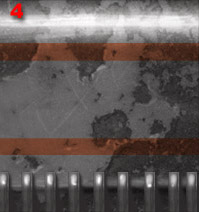
1. Heres a simple monochrome noise added to a dark background, used with blur, motion blur and other techniques it forms the basis of a lot of subtle texture work when working with metals.
2. ADD NOISE again, copied the layer and BLURRED it a little, EMBOSSED it and set the layer to HARD LIGHT, merged it down with CTRL E, and maybe played with the BRIGHTNESS/CONTRAST.
3. This time ADD NOISE and use the MOTION BLUR set to horizontal to get those nice lines, Maybe up the CONTRAST a little as well, I also aibrushed on a couple of lines a black line with a white one underneath simulates an indented line with the lightsource above.
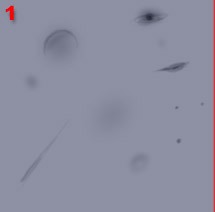
Render Clouds
Another often used technique is RENDER CLOUDS, choose your colours as Black and White so you get black and white clouds. Overlaying these helps to add subtle patchiness and breaks up open spaces of flat colour.
1. Using the image from above as a simple example.
2. Create a layer above the base texture and RENDER>CLOUDS setting the layer to MULTIPLY to add dark patches.
3. Do the same again and create a layer above and RENDER>CLOUDS again this time setting the layer to Dodge to add light patches. The other thing to do is set the OPACITY of the layers low to get the desired amount of patchiness, keep it subtle.
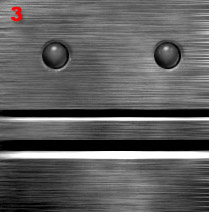
Rivets
Moving onto various detail elements now, starting with a simple rivet. Always create details on a new layer so its easy to clone them using the MOVE TOOL and holding ALT to copy it.
1. First thing select a small circle holding SHIFT to make it a perfect circle, Fill it with a dark grey colour.
2. Keep the selection and Paint in some highlights with a lighter grey and add a sharp-ish highlight at the top.
3. Create another layer and move it below the rivet layer, Paint in an inset by painting a shadow around the top and highlight around the bottom. Now merge the Rivet down onto the inset, CTRL CLICK the layer name to get the selection of the rivet and use the MOVE TOOL while holding ALT to clone the rivet wherever you want.
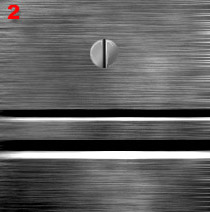
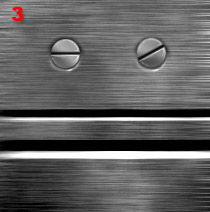
Screws
Same kinda technique, also using the MOVE TOOL and holding ALT to copy it and also rotating em to add a little variety.
1. First thing select a small circle holding SHIFT to make it a perfect circle, Fill it with a light grey colour and airbrush in some shading.
2. Paint a black vertical or horizontal stripe for the screw indent add a few little highlights with a light colour and a small brush, ZOOM in if you need to.
3. Again create another layer and move it below the Screw head layer, Paint in an inset by painting a shadow around the top and highlight around the bottom. Now merge the Rivet down onto the inset, CTRL CLICK the layer name to get the selection of the rivet and use the MOVE TOOL while holding ALT to clone the rivet wherever you want. Add rotations for a little variation.

Insets
Heres another thing I use a lot to add depth to a skin or image, its a simple technique based on light coming from above, so edges that overhang are darker and edges that face up towards the light are lighter.
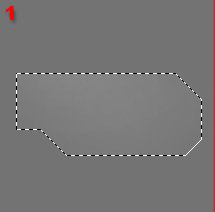
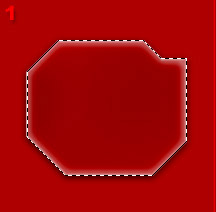
1. OK first off using the polygon Lasso tool and the SHIFT key select an area you want to inset.
2. Now using a Large AIRBRUSH set to black brush lightly over the area to darken it a little. Now using a smaller brush add dark lines under all top edges as theres no light getting to those. Choose a light colour and do the same with the lower edges as shown to show the light that does hit them.
3. INVERT the selection and using a light colour paint in some edges (More on this later) and add some scratches, use the DODGE n BURN to add a little variation and maybe add another inset inside for practice!!
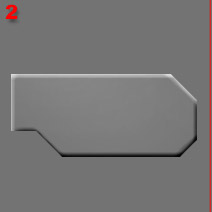
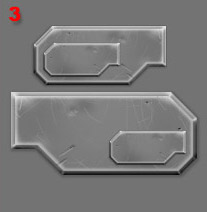
Outsets
Again, similar to Insets but reversed. Top edges get the light while lower edges are in shadow.
1. OK first off using the polygon Lasso tool and the SHIFT key select an area you want to OUTSET.
2. Similar to last time, add in some shadows with the AIRBRUSH along the bottom and side edges, and some highlights along the top and other side edges as shown!!
3. Now using a new layer above add a light EDGE all the way around (more about this in a bit) and some shadow on a layer below, this just helps to make it stand out a little more. Define the corners with hi-lights, add some scratches and maybe some Dents (more on these in a min) try it out for yourself!!
Dents
Sometimes you wanna dent stuff up a bit?? Heres how, basically using the Dodge and Burn tool to add shadows and Hi-lights...
1. First off add some shading with the D n B tool with various sized brushes, add some dents, scratches etc.
2. OK now with ALT held down add some hi-lights, mainly along the bottom edges as those will be the ones catching light form above (in general) scribble around adding more shadows n hi-lights.
3. Now I've OVERLAYed a metal texture from a photo I took, and have beefed up dents by adding more shadows and hi-lights. Note the larger dents are softer done using a large soft brush, the smaller ones are neat and edgey. Play around with this technique, it'll come in useful ;-))
Edges
Edges help to define...well EDGES ;-) heres a simple way using the stroke tool
1. OK, select an area and Fill it with solid colour on a NEW LAYER.
2. By CTRL CLICKING the layer you can get its selection easily, change the colour to a light colour and create NEW LAYER, use EDIT>STROKE and stroke INSIDE at about 3 pixels (this varies according to image size) then GAUSSIAN BLUR it for anice soft edge, now stroke it again with 1-2 pixels and about 50% opacity to add a more defined edge as shown.
3. I upped the contrast a little and on a Layer below filled the selection with Black, GAUSSIAN BLURed it and moved it down a little to add a bit of shadow...next is Scratches...
Scratches
Next up is Scratches, these help to give a worn look and can be subtle or OBVIOUS, anyway they help to define stuff.
1. Remember that last thing with the edges?? CTRL CLICK to get the edge selection again so yu only paint inside...
2. Pick a colour from it (RED) and choose a much lighter version, using the AIRBRUSH and various sized brushes go around the edges and define where the paint has worn off. Sometimes it helps to think about how the part is used and where it GETS worn more from useage. Add some subtler scratches with the D n B tool and a Very small brush.
3. Now its a case of working at it a little more using the D n B tool. Add a few dents, some dirt, little scratches, big scratches etc.
Heres a quick little animation showing the process!!
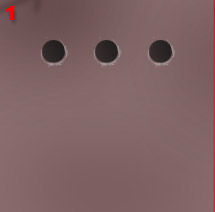
Drips
Drips are ideal for stuff where things leak, holes drip fuel, or where exhaust fumes leave their deposits.
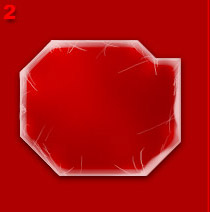
1. Quite a simple one this, made a couple of holes and CLONED em with the ALT key and SHIFT to keep em level.
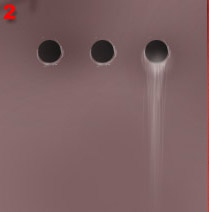
2. Using the trusty D n B tool and holding ALT so it lightens, I draw some lines downwards from the hole using various sized brushes and various pressures bearing in mind the stuff will fade out as it travels down the surface.
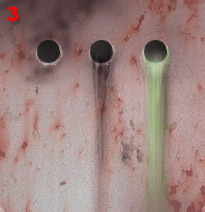
3. Much more done here, OVERLAYed a texture added some green to the far right hole for that slimey effect. The middle one I darkened rather than lightened and the right one I darkened it to give the effect of exhaust buildup.
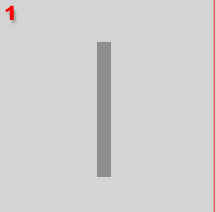
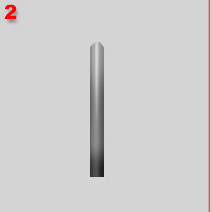
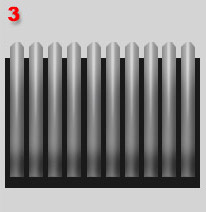
Cloning
This is ideal for creating repetive textures or details.
1. Created a NEW LAYER, selected a Rectangle and filled it solid with a mid-grey
2. Using the old D n B tool again...Darkened the sides and lightened the top/middle with various sized brushes.
3. Now comes the EASY bit, Hold ALT and SHIFT and move horizontally (or vertically if you want) this should make a copy AND keep em in line perfectly, do the same again a few more times. If I have a lot to repeat I copy about 5, Merge em down and then ALT+SHIFT copy em in groups of 5. Comes in useful for all sorts of details!!
Thats it for now, a few basic tips to get ya going!! Hope you found em
useful and more tutorials will be on their way, feel free to drop by my
site/forums and let me know what tutorials you would like to see!!
Cya's