


This week I want to cover a nifty little trick for bringing out depth in glass and plastic. I'm sure you've seen the inner shadow effect applied throughout the web. It is the primary tool for making text or an image appear 'behind' the foreground, as though a portion of the background were cut out to reveal the image beneath or make type appear as a hole in the page.

It occurs to me that not all of you may be familiar with how to apply that effect in Photoshop 6. This isn't your fault… we all have to start somewhere. Here's how to apply the inner shadow:
1) Open an image or create a new image.
2) Create a text layer and enter your type. Keep the type layer
selected.
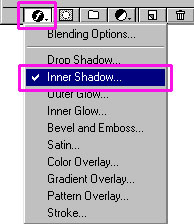
3) Open the Layer Styles dialogue box. You can do this by either
double-clicking the layer in the layers palette or click the "Add
a Layer Style" icon on the bottom left of the layers palette.
Select 'Inner Shadow' from the menu.
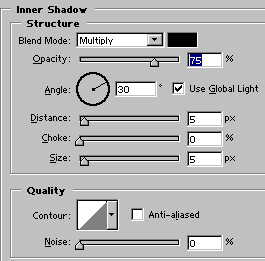
4) Choose your inner shadow settings. The icon to
the right of the dialogue box will show the depth of the shadow
being applied if, because of the HUGENESS of the dialogue box
you cannot see the text. I certainly hope the correct that problem
for the next revision!
5) Click 'OK' to apply the shadow to your text.
Pretty simple… basically the same thing as a drop shadow, but applied inside the contents of the layer.
The combination of a bevel with an inner shadow gives a wonderful illusion of transparency, such as you may find in glass or plastic. Taking the image used before, I'm now going to apply a bevel:
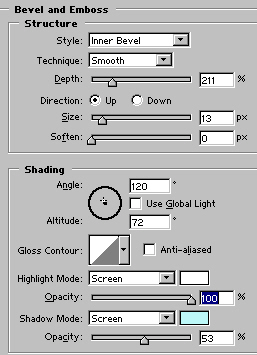
Here's the result:

Now to dress things up a little…

 Al Ward, a certified Photoshop Addict and Webmaster of Action FX Photoshop Resources (