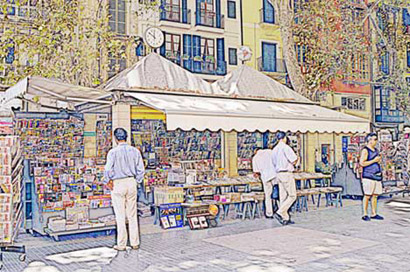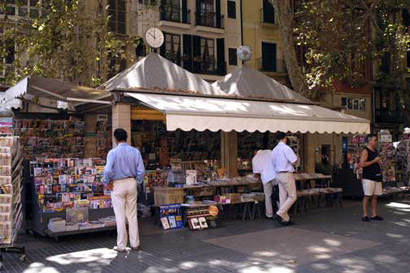
There are many plug-in filters around for Photoshop but it's amazing some of the effects we can achieve using Photoshop's own filters. In this project we are using Photoshop 7 but it can easily be followed in Element 2.
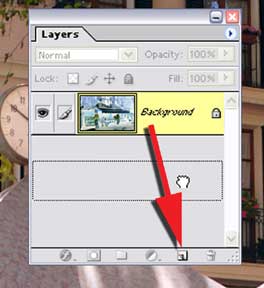
With the image opened in Photoshop duplicate the background layer by dragging it over the Create a New Layer icon at the bottom of the layers palette.
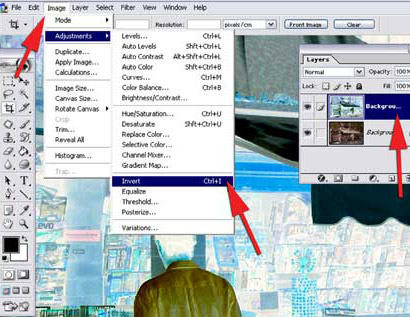
From the Image > Adjustments menu select Invert or try the shortcut Ctrl I. This will now make the image look like a negative.
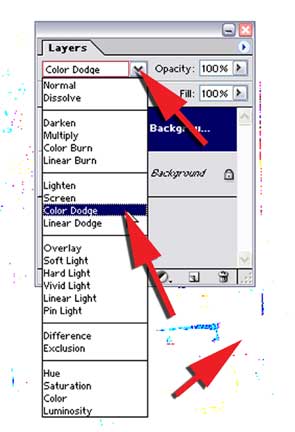
Open the Layers palette and from the drop down menu of the Blend Mode select Colour Dodge. At this stage the image will appear almost completely white but don't worry it is still there!
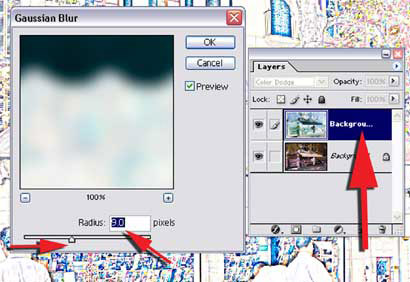
To bring back the image call up the Gaussian Blur filter found under the Filter> Blur >Gaussian blur. As you move the radius slider the image will slowly appear. Choose a radius of around 9 pixels
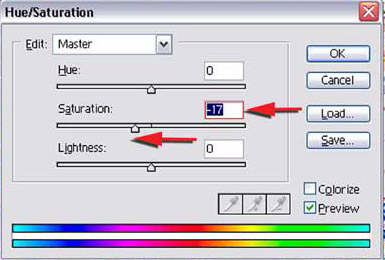
To increase the colour in the image call up the Hue/Saturation pallet from the Image > Adjustments menu - shortcut Ctrl U. Click on the saturation slider and move it to approximately -17 and this will increase the amount of colour in the image!
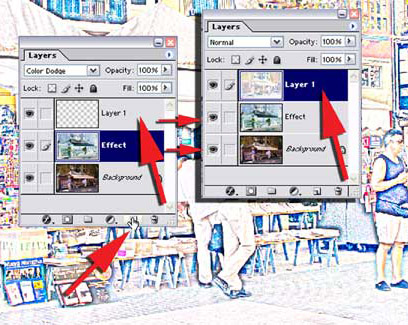
We need to combine all the visible layers into one new layer - this will enable you to continue working in layers. Click on the Create a New Layer icon on the Layers pallets -- this will put a new empty layer above the effects layer and by default names it Layer 1. Holding down the Alt key from the Layers menu select Merge Visible -- this will combine all the visible layers (with the eye icon showing) into this new Layer 1.
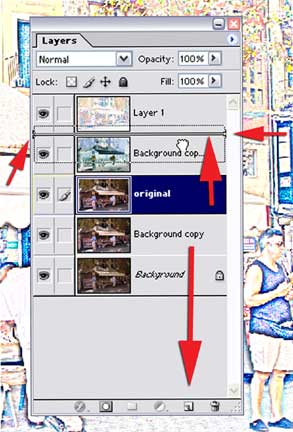
Duplicate the Background Layer by dragging it over the Create a New Layer icon, click on it and lift it up until a black line appears under Layer 1 where it can be released. The new layer will now sit under Layer 1 in our layers stack.
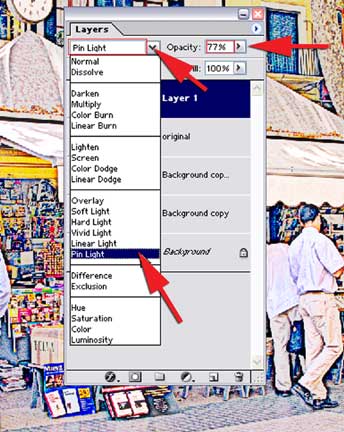
To achieve the final effect you will need to blend these two layers together - Layer1 and the original. Working on Layer 1 from the Blend Mode drop-down menu on the Layers palette select Pin Light and reduce the Opacity to around 75%.
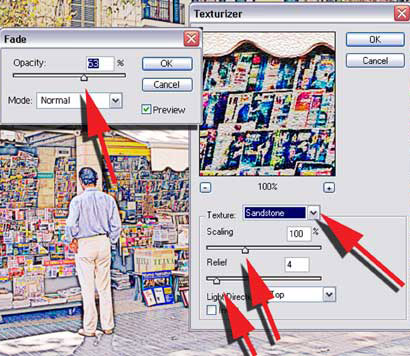
Before adding texture to the image you will need to combine Layer 1 with the layer directly below it. Under the Layers menu select Merge Down and this will combine these two layers. From the Filter menu select Texture> Texturiser and from the drop-down menu choose Sandstone. Leaving the setting at the default click OK -- if you think the effect is too strong for the image, from the Edit menu select Fade texture and reduce the opacity slider to the required amount. Here we choose 60%. Your new image can now be saved.