Not too long ago the third and final episode of the new Star Wars saga created by world-renowned director George Lucas, "Star Wars: Episode III - Revenge of the Sith," premiered. The most impressive and effective scenes, for me, were the duels fought with lightsabers. Bringing Hollywood to our everyday reality, I decided to write a tutorial that describes the process of drawing and adding Star Wars style lightsabers to personal photos.
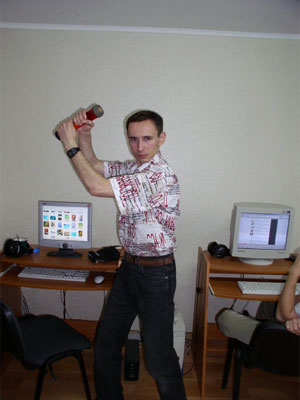
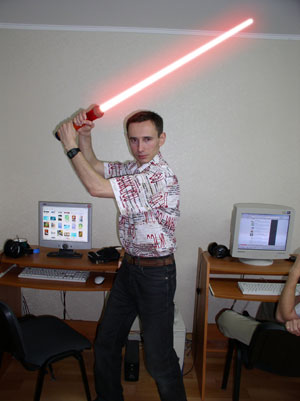
1. Open Photoshop and import a photo to which you will add a lightsaber. I used this photo. As a foundation for the lightsaber any flashlight, large radiotelephone, or cylindrical object will work.
2. Using the Rectangular Marquee Tool (M) create a rectangle in any part of the image. The width should be two times smaller than the thickness of your lightsaber base. The length is up to you. Optimally - it should be half the height of a grown man. I used 30x1000.

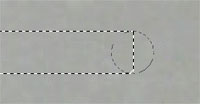
3. Now you need to slightly narrow the tip of your lightsaber and rotate the selection to adjust it to lightsaber base.
Go to Select>Transform Selection. Holding Control move the upper right and lower right corner of your foundation selection closer to one another by 20%. Press enter.
![]()
Now select Elliptical Marquee Tool and holding Shift add a circle to the end of the image.
Go again to Select>Transform Selection. Use Rotate to adjust selection to lightsaber base. Then move selection to fit it to lightsaber base.

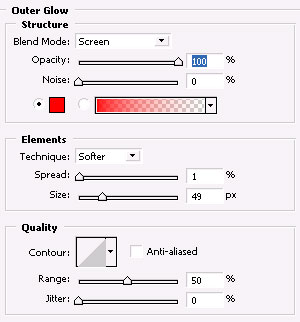
4. Now you need to add light. Create a new layer (Ctrl+Shift+N). Fill it with white color. Deselect (Ctrl+D). Use Blur>Gaussian Blur with a radius of about 10px. Now go to Layer>Layer Style>Outer Glow and use the following settings:
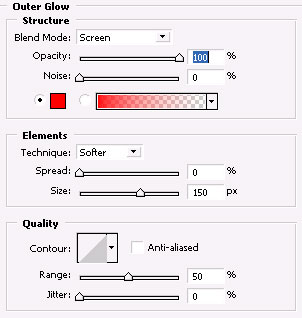
You may use any color for your lightsaber (red as Darth Maul has, green as Yoda has, blue as Obi-Wan has, or your personal color as Minister George ;)
5. Duplicate this layer (Ctrl+J)
6. Create a new layer (Ctrl+Shift+N). Load selection from previous layer (Ctrl+Click) on it. Fill selection again with white. Deselect. Use Blur>Gaussian Blur with radius of about 5px. Now go to Layer>Layer Style>Outer Glow and use the following settings:
7. (optional) Duplicate this layer (Ctrl+J) one or few times to add more glow.
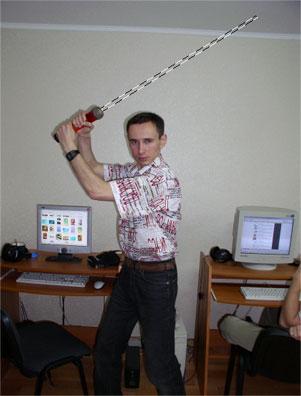
That's all - now you will have something like this:
Download .PSD here.
TIP: You can make an action script in Photohshop to make lots of lightsabers by clicking one button:
After step3 go to Window>Actions. Press the New Action button and then OK. Proceed with all remaining steps and press Stop Recording.
That's it - now, when you open new photo, all you have is to do is to make a selection of further lightsaber and play your action.
