Stitch photos and scans manually.
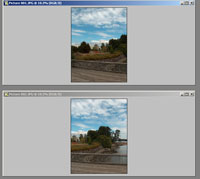
1 |
| Open the first two images. |
|
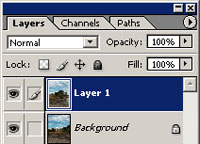
2 |
| While holding the Shift key, drag one of the opened documents to the other. You should now have two layers. |
|
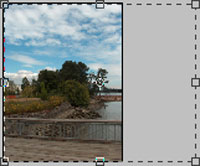
3 |
| Crop the image so there is a larger working area. |
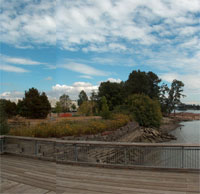
|
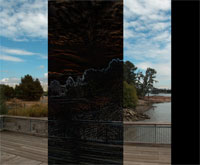
4 |
| Change
the blending mode of the top layer and position it over the layer
below. The area overlapping the bottom layer should be all black
or close to all black. |
|
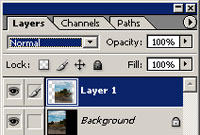
5 | | Change the blending mode of the top layer to Normal. |
|
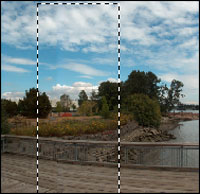
6 |
| Locate the hard edge between the images. |
|
7 |
| Use the Rectangular Marquee tool (M) to make a selection around the edge. |
|
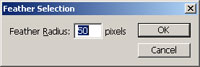
8 |
| Feather
the selection with a large radius. If your selection has round edges
after feathering, undo (Ctrl+Z) and repeat the Feather Selection tool
with a smaller radius. |
|
9 |
| Your
image should be stitched now. If required, adjust the exposure using
the Levels tool (Ctrl+L) and contrast using the Brightness/Contrast
tool (Image> Adjustments> Brightness/Contrast). |
|
10 | | Locate any blurry or unmatched areas. |
|
| |
11 |
| To
remove the blurred areas, use the eraser tool with a large diameter
and a hardness of 0 to erase around the area. Make sure
that you are doing this to the top image. |
|
12 |
| You
may continue to stitch more images to your photograph by increasing the
canvas and repeating the steps in this tutorial. After you have
stitched all your images, you may begin to retouch your photo. |