

PART I: Introduction
Hello to all of you wanting to make good websites... Photoshop is a powerfull tool that can help you a lot in your web design...
By The End Of The Tutorial
We will know how to make a basic II or III column layouts with photoshop.
PART II: Starting It Off
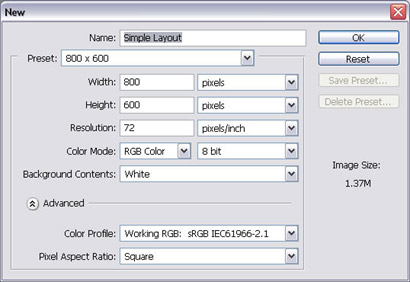
To start the layout, we have to do it simple... define where each section of the layout will be... Let's Make an 800 x 600 image
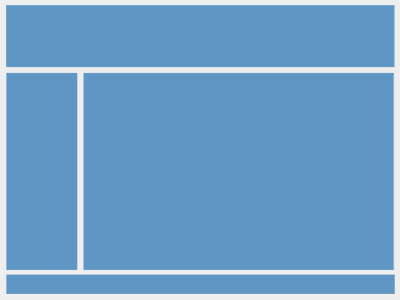
In this image, we define where the main parts of our layout will be:
Header, Left Column, Center Column (if existant), Right column, Footer....
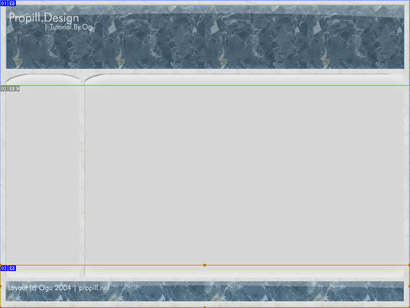
After we have these, we work on more details of it (i recommend
starting off with the header... it will define the stile of the layout
further on)...
Mess around with blending modes and fills untill you like what you see.
Notice how at this point, we have three main sections:
The Header: From the top, untill part of the middle of the layout.
The Body: All the part in the middle that is EXACTLY THE SAME
The Footer: From where the middle changes, to the Bottom.
Now, in case you didn't guess it: We will slice the image in three parts (the ones mentioned before).
 Click to enlarge |
 Click to enlarge |
*hint * for easy maintainance use CSS
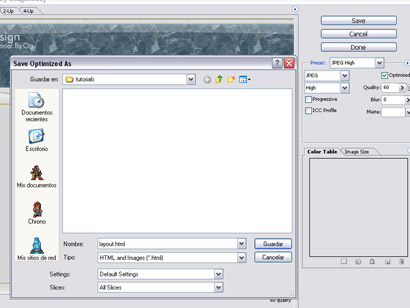
Now that we have the whole layout done, and in place, we make the HTML columns...
To separate the content from the menu column (or the extra menu one in case it's a tri-col layout) you have to calculate the pixels each column uses and make individual cols. with those dimentions.
In my case, i used 256px for the left column and 544 for the content
*hint * separate your layout in three parts (the code, not the design)
From where the HTML starts, to where the content should begin is the header.
the content XD
From where the content ends to the end of the HTML is the footer
to include the header and footer use something like this:
| <?php include("header.php"); include("some_content.php"); <p> more content </p> <img src="/img_articles/5517/image.gif" alt="" /> include("footer.php"); ?> |
Now we have the layout!!!! the rest is up to you to fill up in content :)
PART III: Finishing
We made a whole layout in no time!! yay! It's up to you to make the page better by using CSS or XHTML (instead of normal HTML).
You can use this technique for many styles, it's up to your imagination.