1. Begin with a new file, 300x300, and with a white background. Now go to Filter>Render>Fibers, and apply these settings, Variance 50 and Strength 4. Then go to Filter>Pixelate>Mosaic, Cell Size 25, and then go to Filter>Sharpen>Sharpen, press Ctrl+F, and now should you have something like this.
2. Then go to Filter>Distort>Ocean Ripple, Ripple Size 15 and Ripple Magnitude 20. And then go to Filter>Sketch>Water Paper, Fiber Length 15, Brightness 60 and Contrast 60.

3. Then go to Filter>Stylize>Glowing Edges, Edge Width 8, Edge Brightness 8 and Smoothness 3, and then go to Image>Adjustments>Brightness/Contrast, apply these settings.

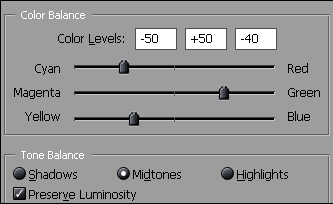
4. Now go to Image>Adjustments>Color Balance or press Ctrl+B, and then apply this settings.
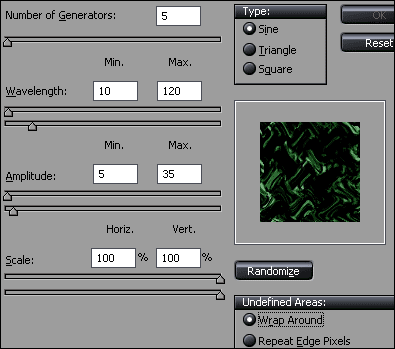
5. Now right click on your background layer and choose Duplicate Layer. Then go to Filter>Distort>Wave, and use these settings.
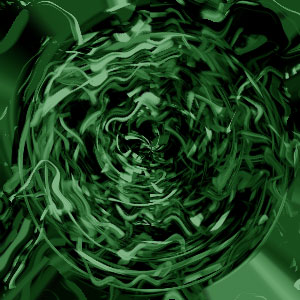
6. Then click on Randomize a few times. And then change the Blending Mode to Lighten. Now go back to your background layer, and then go to Filter>Distort>Polar Coordinates, choose Rectangular to Polar. Now should you have something like this.
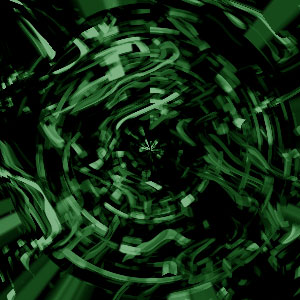
7. Now merge the layers, Ctrl+E, and then repeat step 5 and 6 until you have something like this.