
What better time than Thanksgiving, when the harvest is in, to discuss the crop? Photoshop offers several ways to resize a picture, and we'll start a two-part look with the Crop Tool and Crop command.
Sometimes we must re-compose an image, whether for artistic reasons or because of space limitations, and Photoshop offers numerous ways to do it. In addition to the Crop Tool, we can use the Crop command. And Photoshop has some other tricks hidden up its sleeve, too (which we'll look at next week).
When changing the size of an image while retaining the content, we have the command Image> Image Size available. (We'll explore resizing with this command in a later column.) But often we need to delete some of the image's area to make it fit a certain space or to improve the appearance of the image. Let's look at some of the options.
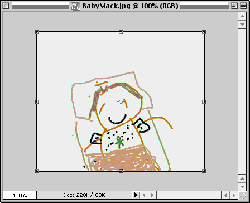
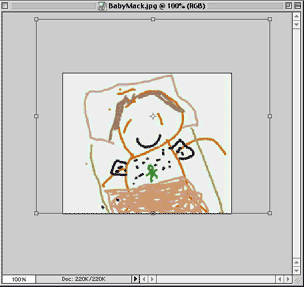
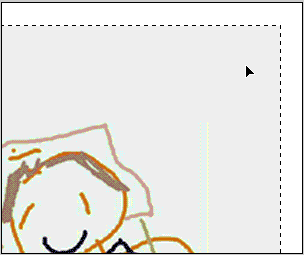
The first tool that usually comes to mind is the Crop tool. To crop an image, in its most basic form, is to remove part of the image area, discarding it forever. The Crop tool works on a basic principle: You position a marquee so that it includes the area you want to keep, accept the change, and anything outside the marquee is eliminated from the image. The image's pixel dimension are reduced to those of the marquee.
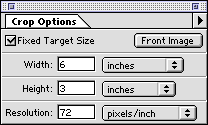
• Fixed Target Size: This option let's
you specify the width, height, and resolution of the resulting
image. The image will be resampled to match the dimensions you
have input. Note that you can input both width and height or
just one. If, for example, your image must fit in a 240 pixel
wide space on a Web page, but the height can be flexible, you
can type in a width and leave the height blank. The marquee
can then be adjusted as you wish. When both width and height
are specified, the marquee's shape is, of course, constrained.
(It can, however, be dragged to increase or decrease the amount
of image enclosed.)
• Front Image: Clicking this button automatically inputs
the dimensions of the front-most image open in Photoshop. It
is only available when Fixed Size is selected. If you have two
images that should match in size and resolution (to composite
or collage, for example), this option can automatically set
the specs that you need.
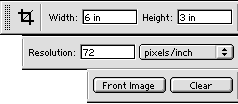
In Photoshop, the Options palette has been replaced by the Options Bar. When you first click on the Crop tool, the Options Bar shows the same basic choices as the earlier Options palette, with one exception. As you can see in Image 2, there is also now a button labeled "Clear." (The Options Bar has been cut and stacked in order to fit on this page.)
Once you've dragged a marquee with the Crop tool, Photoshop's Options Bar changes. The secondary options are shown in Image 3. (The Options Bar has been cut and stacked in order to fit on this page.)
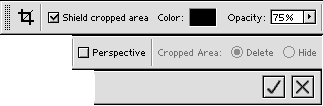
• Shield Cropped Area: This option
masks the part of the image to be deleted. By default, a 75%
gray overlay is applied, but Photoshop allows you to change
to any opacity or color.
• Perspective: The Perspective option allows you to adjust
the cropping marquee to correct perspective errors. This is
essentially an extension of the capability to rotating the crop
marquee to correct the horizontal/vertical axes. It is designed
to work primarily with architectural photography, and will be
discussed separately (and at length) in the second half of this
two-parter, next week's column.
• Cropped Area: The option of hiding the cropped area rather
than deleting is not available when the image consists of a
background layer only. When hidden, the cropped area remains
part of the image. The Move tool can be used to reposition a
layer to change what area is "cropped." Remember that
this capability is lost when the image is flattened, and until
flattened, the file size is not reduced by the crop. (Later
in this column, in the section "The OHidden' Crop,"
I'll shows you how to do something similar on a temporary basis
in Photoshop 5.5.)
To the far right of the second Crop tool Options Bar (shown in Image 3 at the bottom) are the Accept and Reject buttons. These are equivalent to, respectively, Return/Enter and Escape.
In Photoshop, you can rotate the cropping marquee prior to the actual crop. Position the cursor slightly outside of the marquee and it will change to show a curved two-headed arrow. Drag to rotate. Among other uses, this technique can correct crooked scans.
In addition to the Crop tool, you can crop images using the Rectangular Marquee tool and the menu command Image> Crop.
Photoshop allows you to use any selection as a crop marquee. You can even drag the Lasso tool around for a highly irregular selection and the menu command Crop will be available. Will you get an irregular canvas? No, you won't. Photoshop creates a rectangular grid of pixels that includes the entire selection. All Photoshop files must be rectangular.
The "Hidden" Crop
Photoshop allows the choice of deleting or hiding part of
an image being cropped. A similar effect can be accomplished
in any recent version of Photoshop, by rescaling outside an
image larger than the canvas. Image 8 shows the set-up. The
window has been enlarged to allow the transformation bounding
box to be dragged past the canvas. This, in effect, enlarges
the image as shown in Image 9.
Once the image is enlarged and the change accepted, the additional image data remains available, just not visible. As you can see in Image 10, dragging the picture within the window shows that the excess background was not deleted, simply hidden.
Note, however, that the image will be cropped to the canvas size when closed. You can reposition the layer to show the "hidden" part of the image as long as the document is open, but once it's closed, the hidden data is lost.
Six Shooters
• Did you know that you can input any unit of measure into
appropriate fields in Photoshop? Rather than being stuck with
the preferences specified in Units & Rulers, you can use any
Photoshop unit by typing it into the box along with the number.
Let's say that your rulers are set to inches, but you need pixel
dimensions. Simply type the letters px after the number. Photoshop
knows what you mean. You can even type equations, such as 2
in + 24 px.
• Still can't find the Measure Tool? Look under the Eyedropper.
• You can still edit a gradient. Select the Gradient Tool
in the Toolbox. In the Options Bar, to the left, you'll see
a representation of the gradient. If you click on the arrow
next to it, you'll open the Gradient Palette and can select
a different gradient. The pop-out menu in the upper right allows
you to create a new gradient. But to edit? Simply click once
on that picture of the gradient in the Options Bar. Not on the
arrow, just to the left on the gradient itself. The Gradient
Editor window opens right up.
 Pete
Bauer is the Help Desk Director for NAPP, as well
as a Contributing Writer for Photoshop User and Mac Design
magazines. His books include "Special Edition Using
Adobe Photoshop 7" (with Jeff Foster), "Special
Edition Using Adobe Illustrator 10," "Sams Teach
Yourself Adobe Illustrator 10 in 24 Hours" (with Mordy
Golding), and "Special Edition Using Adobe Illustrator
9." Pete writes documentation for a variety of computer
graphics related products, as well as testing software
for a number of companies. As a computer graphics efficiency
consultant, Pete specializes in customized training programs.
He is based in Columbus, Ohio, and can be contacted via
Pete
Bauer is the Help Desk Director for NAPP, as well
as a Contributing Writer for Photoshop User and Mac Design
magazines. His books include "Special Edition Using
Adobe Photoshop 7" (with Jeff Foster), "Special
Edition Using Adobe Illustrator 10," "Sams Teach
Yourself Adobe Illustrator 10 in 24 Hours" (with Mordy
Golding), and "Special Edition Using Adobe Illustrator
9." Pete writes documentation for a variety of computer
graphics related products, as well as testing software
for a number of companies. As a computer graphics efficiency
consultant, Pete specializes in customized training programs.
He is based in Columbus, Ohio, and can be contacted via