In this toturial, you're going to learn how to use "motion Guide" to guide your tweened animation.
Note: Please make sure you have already read and understood the tutorial on "Motion Tweening" as the following tutorial relies on that.
1:
-
Start by clicking on the first frame of "Layer 1", just to be sure the object we are going to draw will be placed there.
- Draw any object you desire and add "motion tweening" to it, 15 frames. As show in Fig 1.
- Right-click on the layer that holds your object "layer 1" and select "Add Motion Guide"
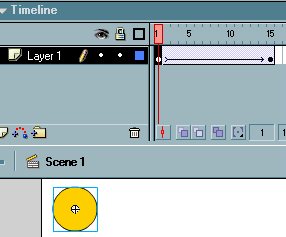
Fig 1
A new layer appears on top of the existing layer? good!
2:
-
ok, now click on the first frame of the new layer and use the "Pencil Tool" on your left to draw any form of lines, straight or a curved.
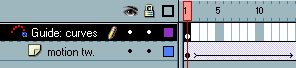
I used the "Line Tool", that's why it looks smooth ;)
This will be the guide that our object (yellow circle) will follow when it's on motion. Look at Fig 2 please.
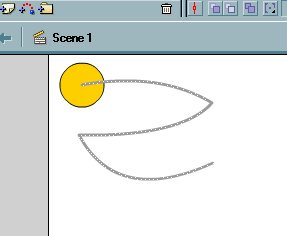
Fig 2
Simple, isn't it?
A couple more steps left!
3:
-
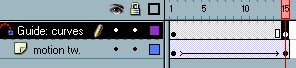
Good, now right click on the 15th frame of the "Guide" Layer and select "Insert Keyframe".
The result should be as follows:
Almost done!
4:
-
Click on the first frame (A) of the motion-tweened object and drag the object to the starting point of the guide line you created.
- Click on the last frame (B) (15th frame in our case) and drag it to the end of the guide line.
As shown in Fig 3
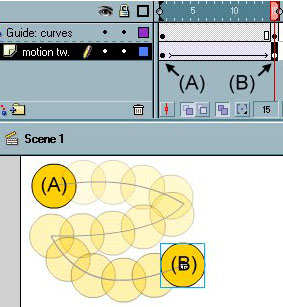
Fig 3
That's it! now test your movie and enjoy the result.
Download *.fla