

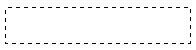
1- Open a new image and mask a square area like this:
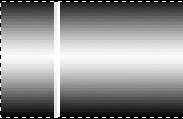
2- Choose white as foreground color and black as background color.
Use the the gradient tool, starting in the middle dragging it down to the end of the selection.
![]()
3- Let's add some grooves for a more realistic efect:
Make a new layer, zoom in, choose the Pencil tool and draw a 1 pixel-line (use
a square brush) over the pipe as shown below (hold the shift-key to make
a straight line):
Now apply the Blending Mode "Overlay" for this layer.
Next we make another layer, painting a black line next to the white line on the left side:
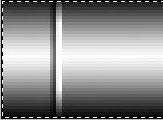
Zoom out and look what we've got:
![]()
4- Pick the Type tool and write whatever you want, scale and move it around as you like - Choose a position out of the middle of the pipe to have the effect more realistic.
![]()
5- Next, apply the Blending Mode "Overlay" for this layer like we did before
and see the change - the text looks like being painted on the pipe.
Go to Image- Adjust- Brightness/ Contrast and set Brightness and Contrast to
a setting you like... text should be readable but not too "strong".
Ready if you don't want any colour in it!
![]()
6- You can change the colour of the pipe by using image- adjust- hue/satursation -check the "colorize" box, the text will change it's colour too.
![]()
Make 2 or more grooves - step 3 - to give it more round feeling.
 Now see our tutorial for Assembled
Pipes
Now see our tutorial for Assembled
Pipes
 Yellowpipe offers Photoshop Tutorials as well as Serious Web Hosting and unique Free Webmaster Tools.