

The following tutorial is courtesy of "Mac Design Magazine"
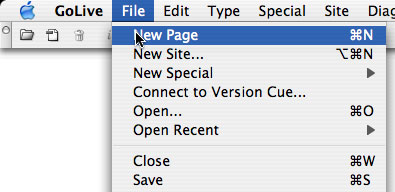
Step 1 Start a New Page
Begin with a new page by choosing File -> New Page. (Normally, I don't recommend creating your new pages this way but this page is not destined for the Files tab.)/td>
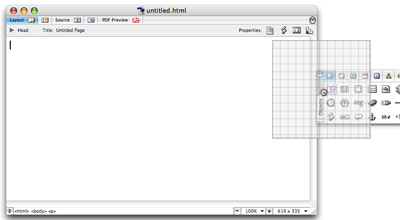
Step 2 Place a Layout Grid
Drag the Layout Grid object from the Basic tab of the Objects palette. (You can also just double-click the Layout Grid object and it'll land wherever your cursor is on the page.) After you place it, drag its handles or use the Inspector to set its size. Turn off the snap feature unless you want items snapping into place.
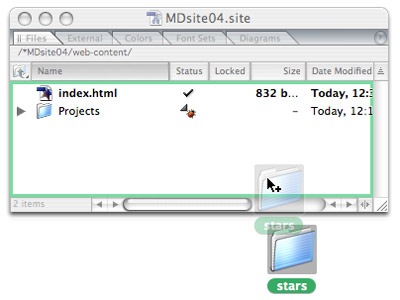
Step 3 Add graphics to your site
As always, drag the desired graphic(s) into the Files tab of the Site Window. The cursor's plus sign tells you that the files are being copied into your site, not moved around on your hard drive. For organization's sake you'll want to either add these images into an existing folder or create a new folder for them.
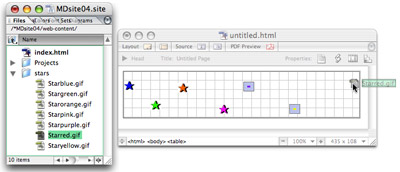
Step 4 Place the graphics on your page
Drag each desired graphic onto your Layout Grid. You can place them rather roughly at this time, then use the Align palette later. Here, I have just been sure to put the first and last ones at the left and right edges. GoLive can then distribute them for me.
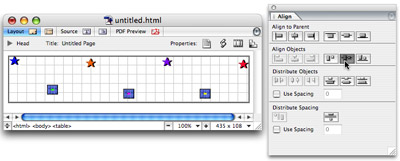
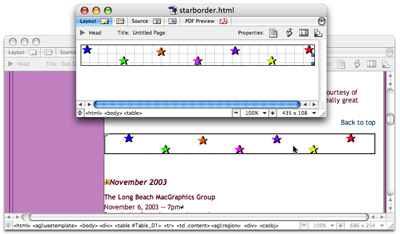
Step 5 Align your graphics
Open the Align palette, Window -> Align. Select the images that will share a common alignment, then
click the appropriate button. You can then select other images and click another alignment button.
For this, I selected all of the stars then clicked Distribute Objects, center, to spread them evenly
between the left-most and right-most stars. Next, I selected the top stars (every alternate star) and
clicked Align to Parent, aligning them to the top of the Layout Grid. I then selected the lower stars
and clicked Align Objects, aligning their centers horizontally. While those three stars were still
selected I used the arrow keys to move them upward until I liked the look.
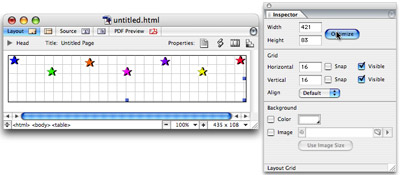
Step 6 Optimize the Layout Grid
Select the Layout Grid, then click Optimize in the Inspector. This removes all extra grid space below the graphics and to any that may be at the right.
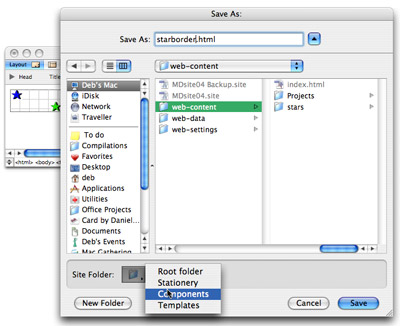
Step 7 Save as Component
Choose File -> Save. (If you've already been saving the page as you designed it, choose Save As.) In the name field give the file a short but descriptive name so you you'll easily recognize it later. Now click the Site Folder button at the bottom of the Save dialog and choose Components as shown here. Finally click Save.
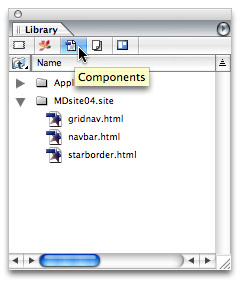
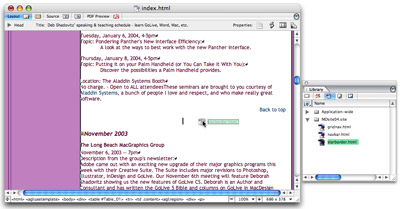
Step 8 Open the Library Palette
Choose Window -> Library to open the Library palette, or if it's docked at the side of your screen,
click its tab to pull it out. In the Library palette, click on the Components icon. It's the icon of
the single page document.
Your component was saved for your site so click the arrow to the left of the site's icon. (If you have
more than one site open you will also see that site's name there and you'll always see Application-wide
there as well.
Step 9 Place Component on your page(s)
Open the page onto which you want to place this new decoration and prepare a place for the Component
by adding a line. Components, like any other item, live inline with the cursor. Components can be directly
on the page, inside a table cell, or anywhere else. To place the Component simply drag its icon from
the Library palette into place on your page.
The main point of a Component is that you can add it to many pages and/or use it multiple times on
any page. Just repeat this Step
Step 10 (Optional) - Edit your Component
You don't ever have to edit your Component but the coolest thing about Components is that you can. To edit it, open the Component, make your changes, then save it again. You can open it from any of several places: double-click it on any page as shown here, double-click it in the Library palette, or double-click it in the Extras tab of the Site Window Either way, when you save the changes the changes will be reflected on all of the pages.
Courtesy of Layers magazine.