

The following tutorial is courtesy of "Mac Design Magazine"
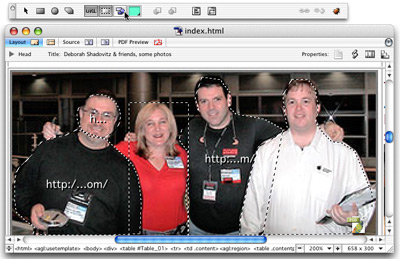
Want to add another dimension to your site's images? Consider using image maps. With an image map you can break up a single image into multiple clickable regions, each with it's own hot spot. Each hot spot can link to another page as shown here and live at shadovitz.com - or it can trigger and event such as making a layer visible. Whatever you do with your hot spots, the basics are the same.
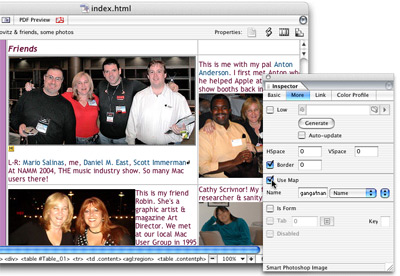
Step 1 Select the image
Select the image on your page. Then, in the Inspector click the More tab and check Use Map. (When
you do, you'll notice that a small yellow M box appears below the image. This is a marker for code
that denotes it as an image map.)
Note: After you begin to create your image map you can still move it. The mapping on top of it will
follow. It's a good idea to select the M marker and move it along with your image so all the code stays
together and you can figure out your own work more easily later. )
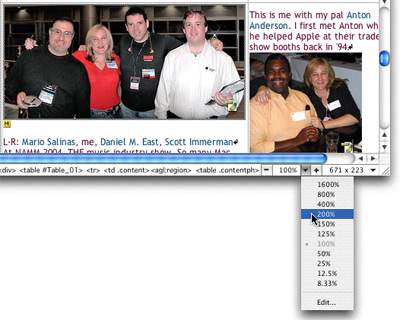
Step 2 (Optional) Zoom in as needed
If you need to see your image's areas better, zoom in on it by using the Zoom tool at the lower right of the page. Truth is, you can do this at any time, not just before you begin. Zooming in and out doesn't ruin your image areas.

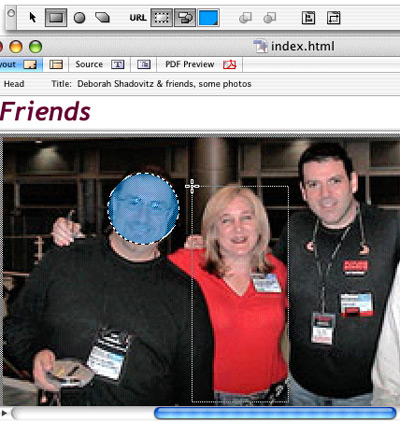
Step 3 Define your first region
When you checked Use Map, the toolbar morphed, so you're ready to define your first image region. Click one of the three map area tools on the toolbar - rectangle, circle, or the build-your-own-shape polygon - then drag out the area over your image. Don't worry if the area doesn't land exactly where you want it. Release the mouse when done. By default your shape will be shaded for easy identification. Here we begin with a circle.
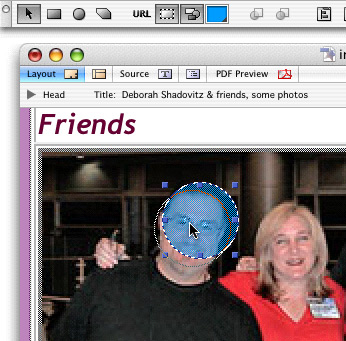
Step 4 (Optional)- Refine the position
Click on the shape and drag it into better position. You'll find the Select Area tool is already waiting for you because after you release the mouse to finish your first shape the tool reverts back to this tool.
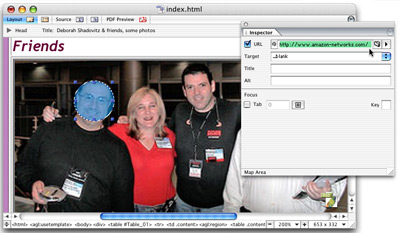
Step 5 Create the link
Region still selected, create the link to your destination page. You can use any of the regular linking methods including the two most popular - Command-dragging to Point and Shoot and Pointing and Shooting from the Inspector. In this case, I have an external URL copied from my browser and ready to paste, so I'm pasting in into my URL field. I've also set the link to open in a new browser window.
Step 6 (Optional) - Define a Rectangle
The Rectangle tool works just like the circle. You just drag out the area. Note: In this example I'm using the rectangle to define a region for the photo of me. I can do that because I can send it to the back later, bringing the area of Mario's body in front. I might normally use the polygon tool for this but I want to demonstrate all tools and possibilities.
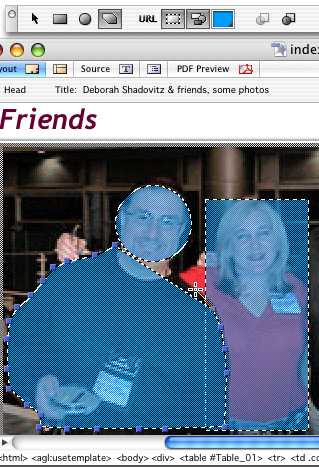
Step 7 (Optional)- Define an Irregular Area
The Polygon tool lets you create your own shape, but is trickier. Polygon tool selected, click to
place the first handle, then click again to place the second, then third. Don't let the closed triangle
confuse you. Keep laying points along your area. Be careful not to click off of your image so you
don't close and complete the shape prematurely. When you're finished, click the Arrow tool and you'll
see the four handles define the area.
Note: I could have just done one full polygon to define Mario but I needed to show
you a simple circle first.
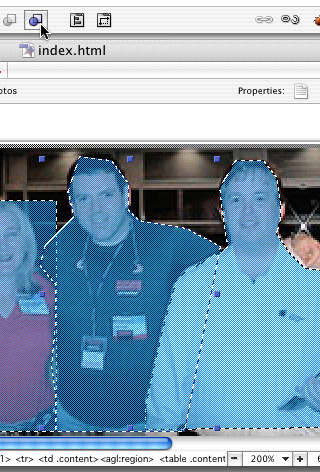
Step 8 (Optional) - Arrange layers
You'll be relieved to know that regions can overlap. The front-most area will simply be the active one. At any time as you create regions or work on your page, just select a region and click the Bring map area to front or Bring map area to back button. In this case, I defined Scott (in the white) first, then did just a rough shape, shown here, of Dan. By sending Dan's area to the back, I don't have to worry about the extra area at the right since it'll be behind Scott, who was perfectly defined.
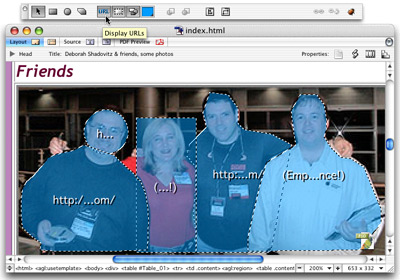
Step 9 (Optional) - View URL's
After you've created links, you'll want to know which regions are hot. To see this clearly, click the URL button on the toolbar. This shows you each region's URL. Any unlinked regions will say (Empty Reference!) just like the Inspector does for an incomplete link. In this example, both Scott and I lack line destinations.
Step 10 (Optional) Give yourself a hand
There are three ways to help you see your areas more clearly. By default each region is filled in with blue. If another color is easier on your eyes, change the color by clicking the Select Color button on the toolbar, then choosing a color. You can also turn the coloring off it you prefer. The Colorize button toggles it on and off. Use the Show map area edges button to toggle the region's outline on and off. Here, outline shows, color does not, but when color does show it's a light green.
Courtesy of Layers magazine.