

First of all create a new document 250X250.
Fill the background black.
Now go to Filter - Render - Lens flare and use brightness 100%, lens type 50-300mm Zoom.
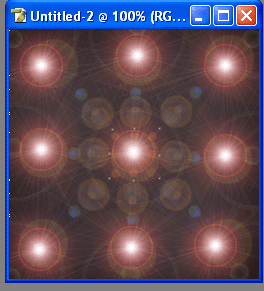
Place six lens flares around the document like this:
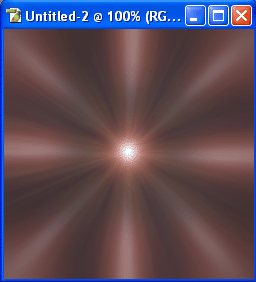
Now go to Filter - Blur - Radial Blur and use these settings: Amount - 100, Blur Method - Zoom, Quality - Best.
Press Ctrl+F 3 times.
You should now have something like this:
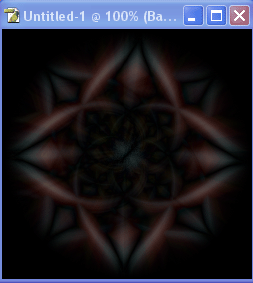
Now duplicate the layer twice.
Highlight your background layer (the very bottom one) and go to Filter - Distort - Twirl and put angle to 200.
Then go to your second layer and go to Filter - Distort - Twirl and put angle to -200. Then go to the second layers blending options. (To do so double-click the layer) and set it's blending mode to Lighten.
Now double click your third layer (the top one) and set it's blending mode to Difference.
And there you have it, a nice gothic abstract background.
Your final product should look something like this:
Hope you liked it.