

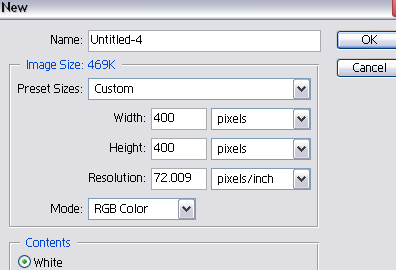
Step 1: Create a new document (400x400) and fill it with black.
Step 2: Go to layer -> new -> layer from background.

Step 3: Go to filter -> render -> lens flare and with the default settings, position it in the top-left corner.

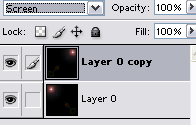
Step 4: Duplicate your layer (Ctrl+J) then go to edit -> transform -> rotate 90 CW, after, set your blending mode to Screen. Merge all layers.
Step 5: Duplicate once again. Go to to edit -> transform -> rotate 180 . Set your blending mode to Screen. Merge both layers.
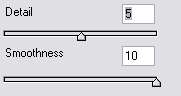
Step 6: Go to filter -> sketch -> chrome with these settings :
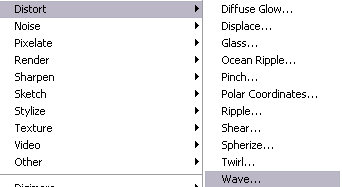
Step 7: Duplicated your layer then go to filter -> distort -> twirl with these settings :
Set your blending mode to Lighten. Merge all layers.
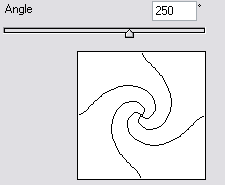
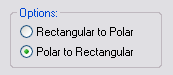
Step 8: I hope you've caught on to the trend. Duplicate your layer and go to filter -> distort -> polar coordinates with these settings :
Set your blending mode to Lighten. Merge all layers.
Step 9: Okay, this is the last time, I promise. Duplicate your layer then go to filter -> distort -> wave with the default settings but click on 'Randomize' a few times. Set your blending mode to Lighten. Merge all layers.
Step 10: Open up the Color Balance box by going to image -> adjustments -> color balance and use these settings :
Midtones:
Color Levels : -20 0 +20
Shadows:
Color Levels : -22 0 0
Highlights:
Color Levels : -11 0 +9
Step 11: Go to image -> rotate canvas ->90 CW. Go to filter -> stylize -> wind with these settings :
Method: Wind
Direction: From the Right
Then go to image -> rotate canvas -> 90 CCW.
Step 12: Last step, go to image -> adjustments -> brightness -> contrast with these settings :
Brightness: -10
Contrast: +20
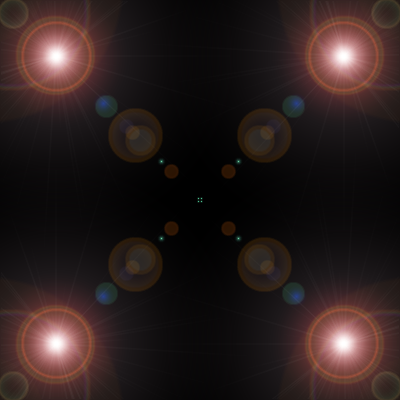
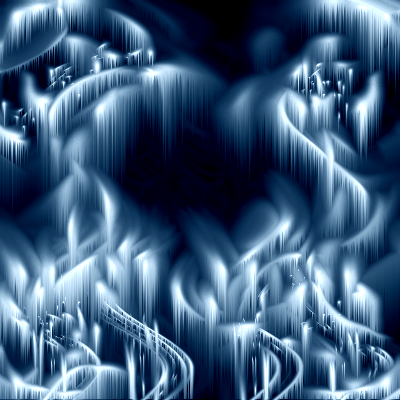
If you change the contrast, brightness and color balance earlier you can make something like this :
I hope you liked this tut.