Start out with a new file. It must be wider than it is tall to work right. Mine is 400x100.
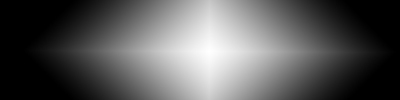
Make sure your colors are set to default (blank and white) and select the gradient tool. Select the diamond gradient, and select the inverse option and make yourself a nice diamond like this:
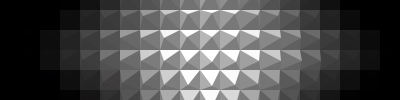
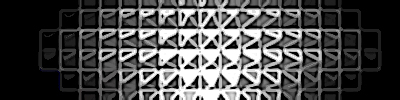
Then go to Filter > Stylize > Extrude. set options to: Pyramids, 20 size, 40 depth, select level based, and make sure that "mask incomplete blocks" is unchecked.
You should get something similar to this:
Next select Filter > Brush Strokes > Accented Edges. Set width 2, brightness 38, smooth 5.
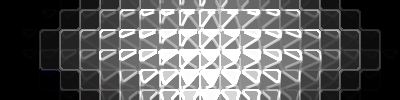
Then select Filter > Artistic > Poster Edges. Adjust settings to 2 thickness, 1 intensity, 2posterazation.
Filter > Distort > Polar Coordinate is next. Select Rectangular to Polar.
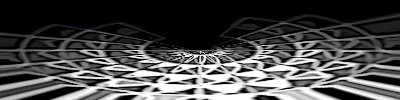
Next go to Image > Rotate Canvas > 90cw. And then go to Filter > Stylize > Wind. Select the "From the Left" option. Repeat this step once, to extend the wind effect. Go back to Image > Rotate Canvas > 90ccw
You should have something like this now:
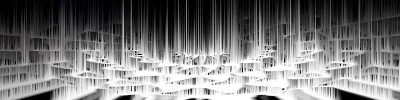
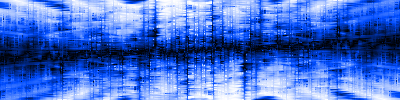
Apply the same wind effect once more, then apply the wind effect with the "From the Right" option selected. You should get something like this:

Duplicate the layer.
Select the top layer, and then: Edit > Transform > Rotate 180. The top layer should now be upside down. Set the top layers blending mode to: Difference
Merge these two layers by going to Layer > Merge Down.
Next add color to the image: Image > Adjustments > Hue / Saturation, select the "Colorize" option. I used these settings: Hue=223 Saturation=100 Brightness=0
Last thing to do is go to Filters > Liquify. Select the "Turbulance" tool and set the brush options to: Size=5 Pressure=50 Jitter=70. Work your way from right to left on only the bottom half, working from the top down to get a nice wavy look.
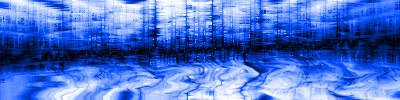
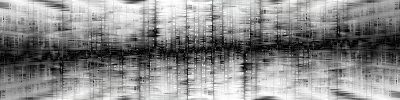
Here's how it should look once its all done: